I built a bikepacking bike to race one of the most challenging ultra-endurance events out there
An affordable titanium frame, unusual handlebars and a very special set of cranks, here is a deep dive into my bike setup for the Highland Trail 550 bikepacking race
Editor's Note:
At the time of publishing, the 2026 Highland Trail 550 is in full swing. It started on Saturday morning, so competitors are currently on their third day of riding. Graham has stopped for just six hours and 25 minutes since then.
He currently sits in 2nd place, and is closing in on Checkpoint Six at Fisherfield, having covered 560km, most of which on rough mountain bike - and hike-a-bike - terrain.

You can follow along with Graham's progress here.
Below is a bike check and recap of Graham's 2025 attempt. His setup remains largely unchanged for this year.
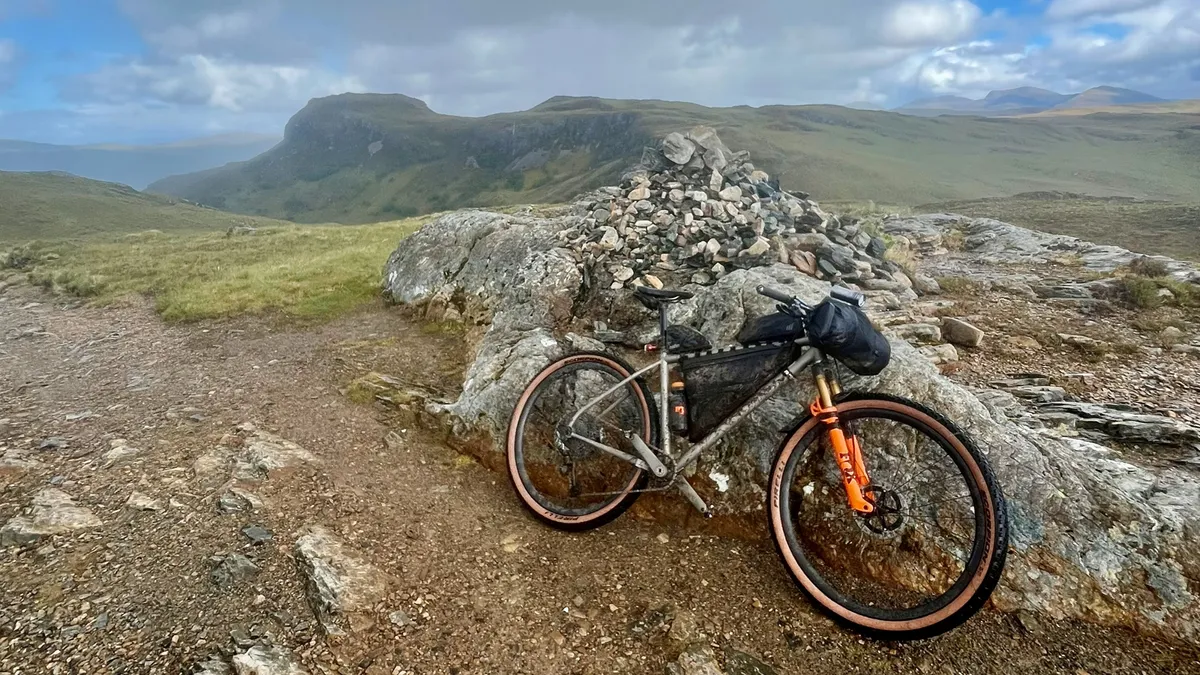
Aptly, the story begins in Fisherfield.
It’s been raining more on than off for the last 60 hours, but in this remote valley, sandwiched between towering mountains, it’s really coming down hard now. I squint at my GPS, I’m still on track, although there isn’t even the suggestion of a path or trail through the bog in front of me. I trudge on, knowing I have at least another couple of hours of pushing across waterlogged ground and over a mountain pass before I will be able to start riding again. This is Fisherfield, and it’s considered the crux of the Highland Trail 550, a bikepacking race that has earned a reputation for being extremely attritional and unforgiving.
The latest race content, interviews, features, reviews and expert buying guides, direct to your inbox!
Although Fisherfield is one of the most challenging parts of the route, it isn’t the only section that will derail a rider's race. The HT550 route snakes its way through the Highlands of Scotland. Starting in Tyndrom, it heads north before looping west, then south, and back to the start point. From the singletrack of the Bealach Horn to the rock slabs of Torridon, many sections demand sharp MTB skills and are connected by long, remote gravel sections where resupply options are few and far between. Combine that with weather conditions that can transition from glorious to diabolical in the blink of an eye.
So many uncontrollable factors mean there is no perfect bike for this race, so every bike lining up at the start is a reflection of a rider's strengths and weaknesses. With even the smallest detail having the potential to have massive effects during the race, I put a lot of thought into building the bike that I would race on the Highland Trail 550.
Hardtail vs full-suspension frame and some hard-wearing bearings
The first big decision was whether to choose a hardtail or a full-suspension bike. Although I think full-suspension has the potential to be faster due to the extra grip and comfort it affords, hardtails are still the dominating force on this route. With a background in mountain biking, I was confident I would have sufficient skills to pilot a hardtail down the most challenging technical terrain on the route. While I would sacrifice some comfort choosing a hardtail, it's offset by having more frame space for storage, so I wanted to find a frame with a high top tube that would help me make the most of it.
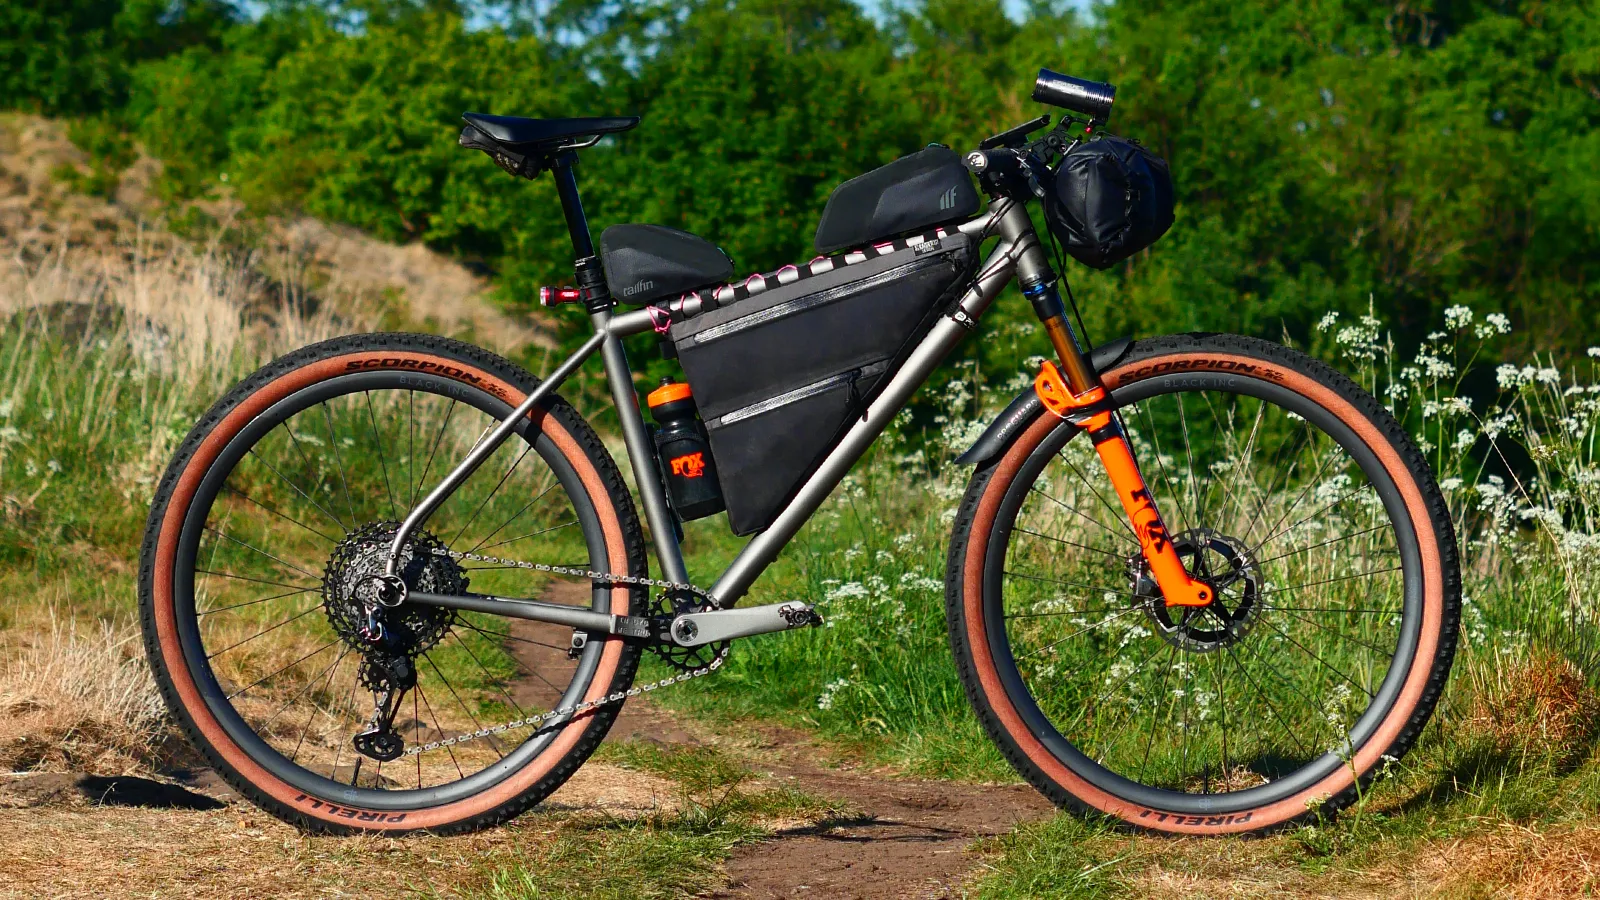
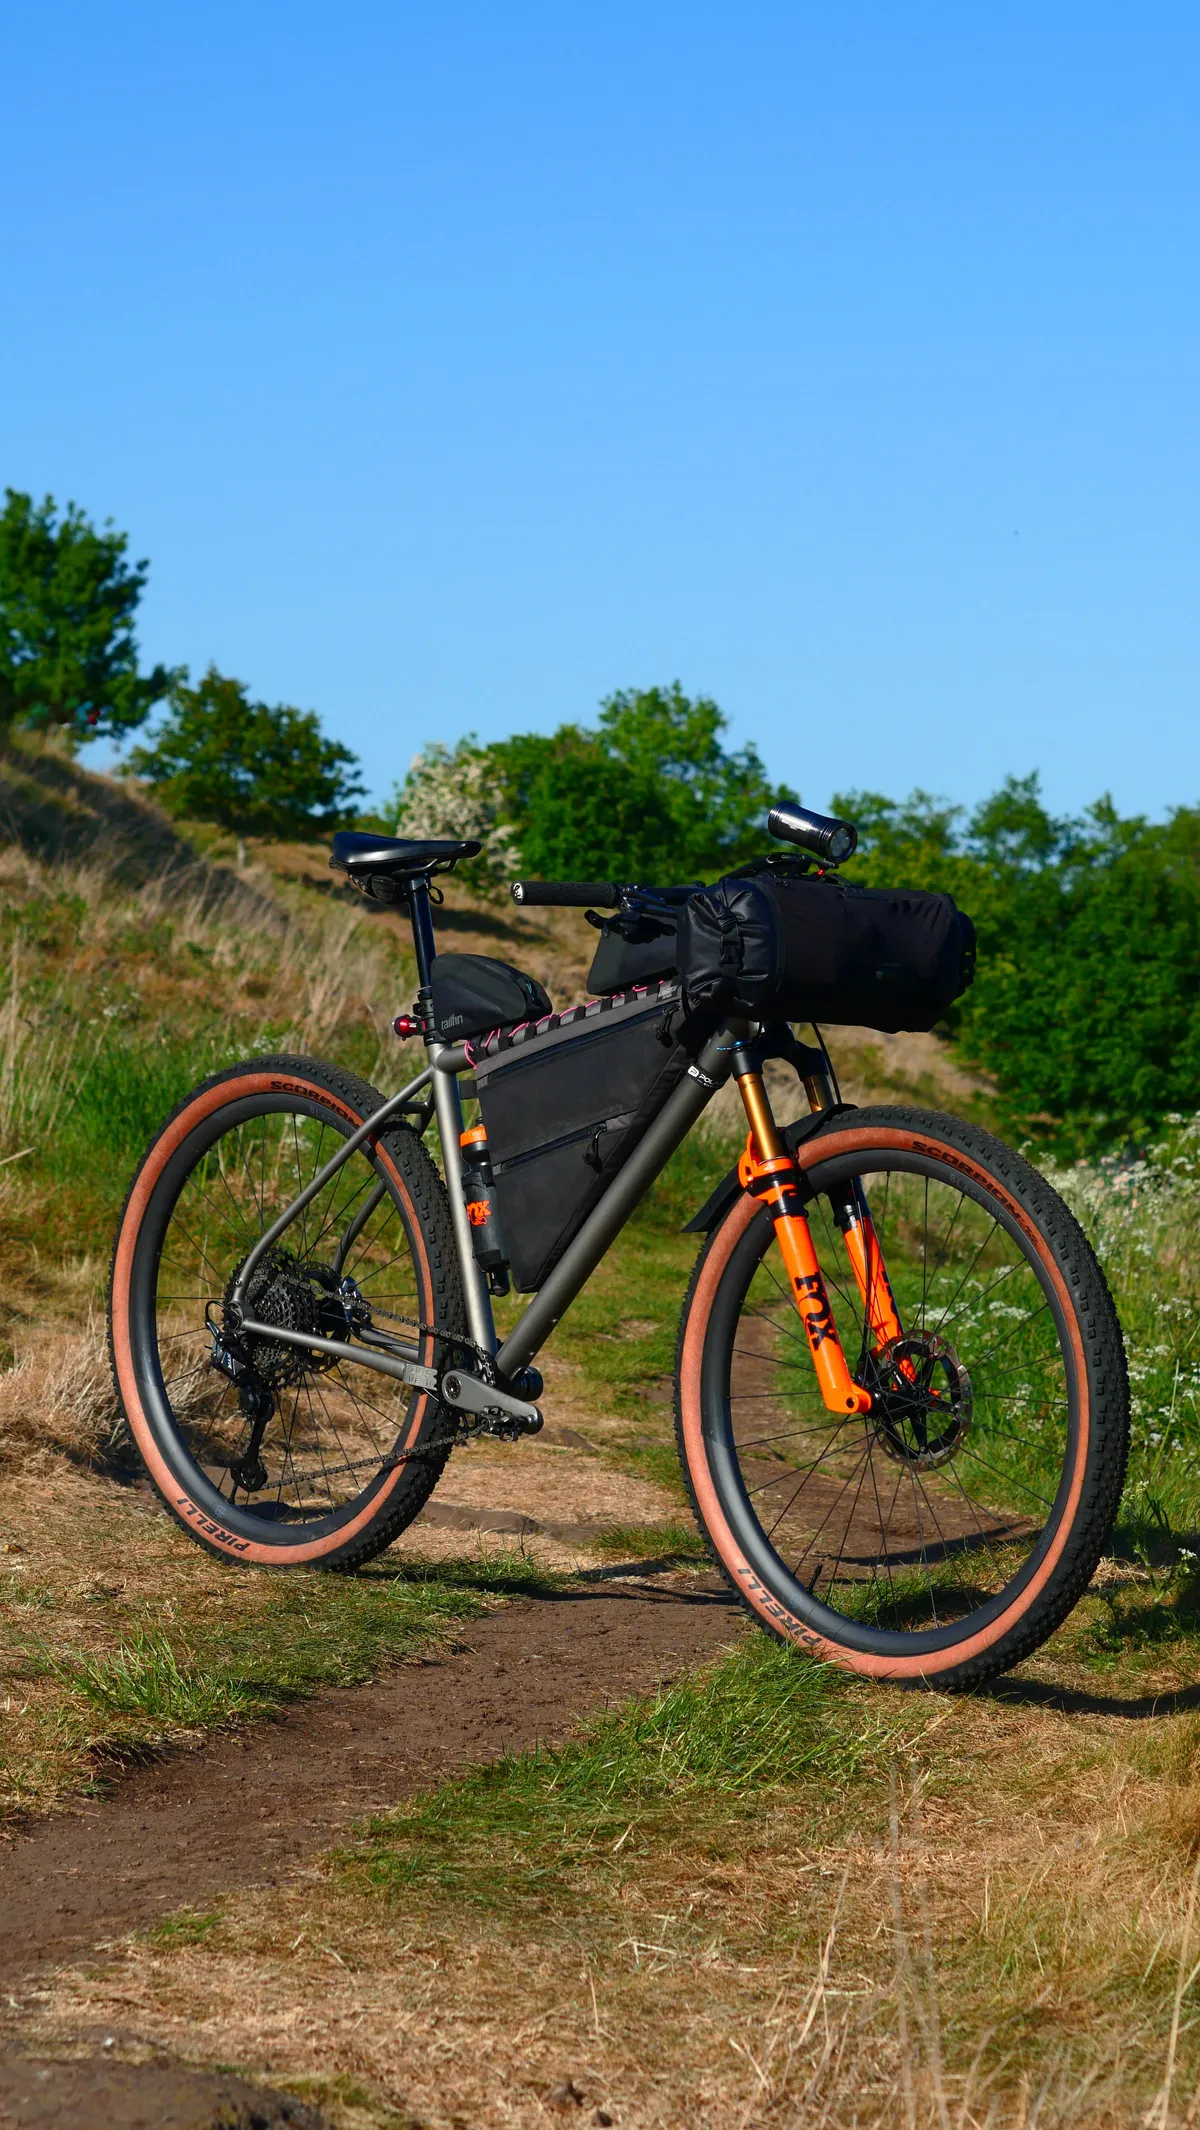
There aren’t many dedicated bikepacking framesets that also have a bit of XC performance baked in. When I saw the Gloria* All Terrain, it immediately caught my eye. Geometry is modern enough to be confident on singletrack without feeling like a handful on faster, flatter terrain. The high top tube opens up loads of real estate for a big frame bag, plus there is plenty of clearance for 2.4in tyres. Most comparable framesets are made from steel, but All Terrain is built from Grade 9 3Al-2.5V titanium butted tubing, saving some weight and easing the worries of abrasion damage that comes with strapping bags to a bike.
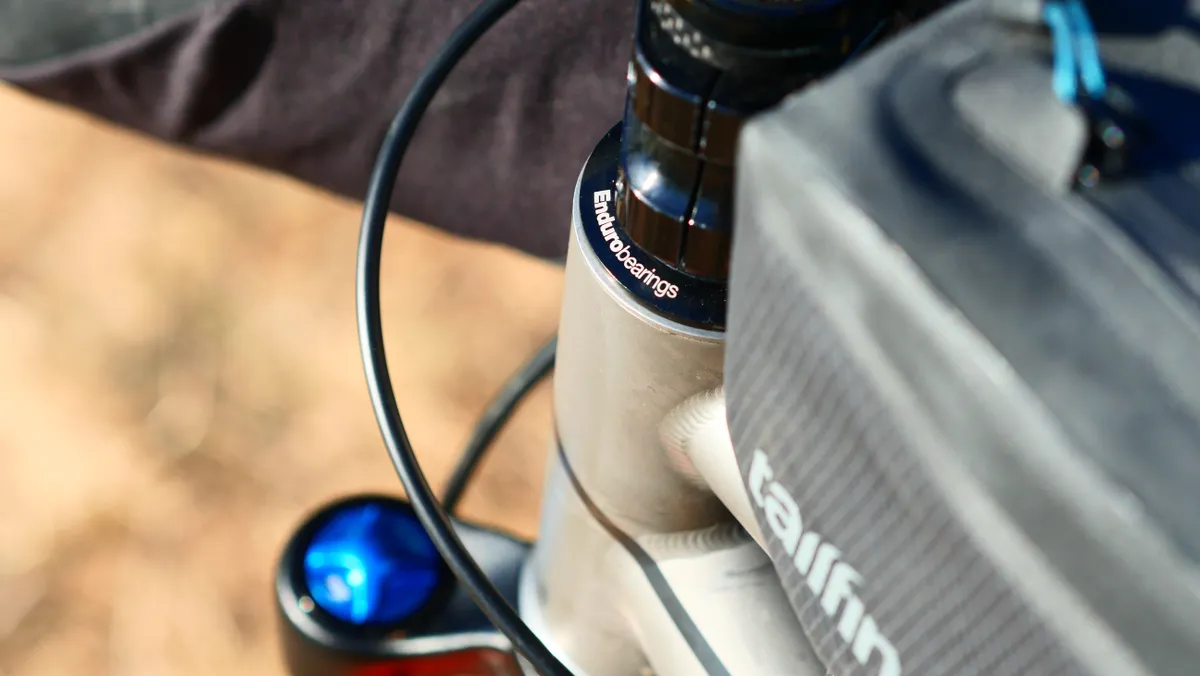
I run Enduro Bearings on my mountain bike and have been very impressed with the durability, requiring zero maintenance over the last three years. As this bike was likely to face a lot of riding in some inhospitable conditions and its fair share of river submersions, I specced an Enduro Bearing headset and bottom bracket to ensure that the handlebars and cranks would continue to spin smoothly.
Suspension and dropper post
Before I even started delving into the finer details of this build, I already knew exactly what suspension I wanted to run. Having already used Fox’s 32 Step Cast fork on several test bikes and on every ride, it has consistently impressed me with its performance. The silky smooth and immediately reactive action means it hoovers up trail vibrations on the long sections of gravel and double track that less sensitive forks might otherwise ignore. It's also claimed to be the lightest 100mm XC fork on the market, yet the chassis remains remarkably taut and precise when ploughing into technical terrain.
I tuned the suspension up a little differently from how I would for a normal cross-country ride. I set the fork up with a little less air pressure than Fox recommends for my weight. With long sections of gravel and rough double track, I wanted to enhance the small- to mid-bump plushness to stave off hand discomfort for as long as possible. The fork has a three-position handlebar adjustment too, so if I wanted to lock the fork out when climbing or needed a little more support when descending, it was available to me at a flick of the thumb.
To match the fork, it only made sense to also run a Fox dropper. To carry on the lightweight theme, I chose the Transfer SL with 125mm of travel. Ideally, I would have wanted more drop, but the minimum insertion depth of the frame stopped me from using the Transfer SL in its longest 150mm length. It’s worth noting that the Transfer SL has its limitations for bikepacking. It's one of the lightest dropper posts around with its mechanical internals, but the two-position design means the dropper can only be ridden either fully extended or fully down. That means it’s not compatible with a seatpack that mounts to the seatpost, which is essentially all of them. I'm not a big fan of seatpacks when riding off-road, though, so this wouldn't be an issue for me.
Fox recently released a dual lockout and dropper lever, although it was out of stock when I built my bike. Luckily, the separate lockout and dropper lever both play well with each other. I ran the lockout lever a little further inboard so that it cleared the dropper lever, and after a few hours of riding, the lever positions were second nature.
Keeping it mechanical
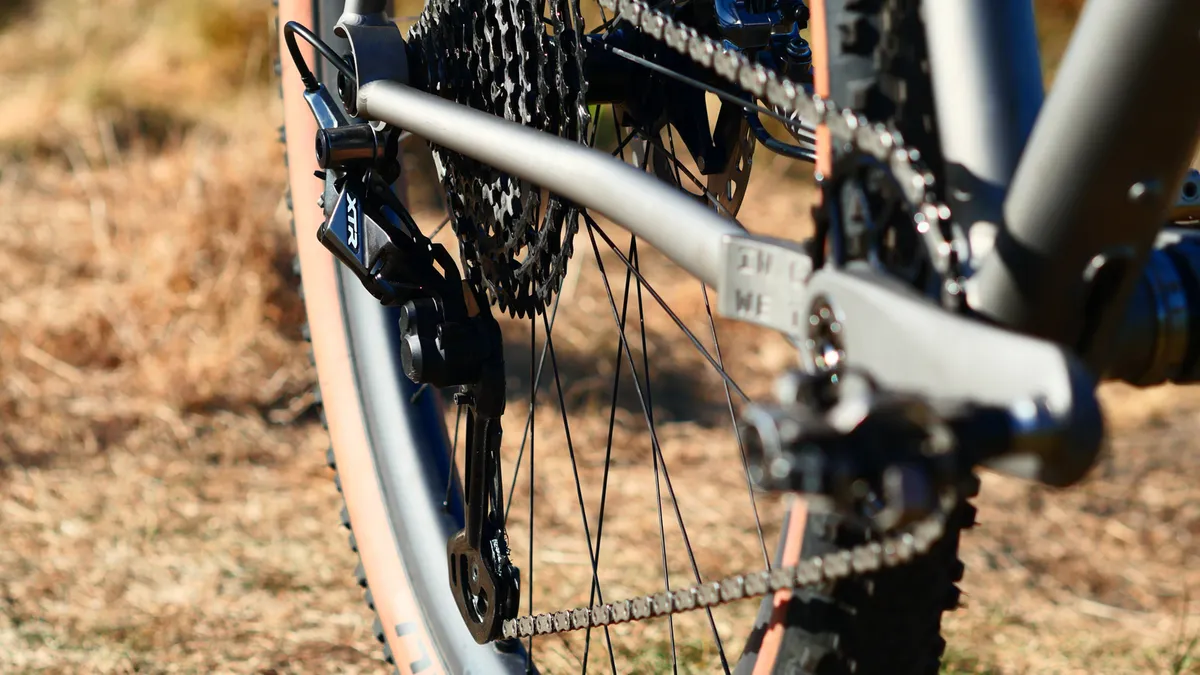
While I could have got my hands on one of the new Shimano MTB Di2 groupsets, I wanted to go full mechanical for peace of mind. I have never had an issue with electronic shifting and ridden several electronic groupsets in some really terrible conditions, but there is enough to think about in an ultra race without having to worry about more electronics and more batteries. Shimano’s XTR M9100 mechanical groupset is arguably the pinnacle of cable-actuated gear shifting, delivering smooth and crisp shifting throughout the ride.
Although Shimano’s own XTR crankset would have performed admirably, I instead had the opportunity to get my hands on something a little more special. I couldn’t say no to this Sturdy Cycles' 3D-printed titanium crankset that was looking for a good home.
These cranks are made to order and constructed from 6/4 titanium, plus the shot-blasted Titanium finish pairs beautifully with the titanium Gloria frame. Featuring a custom-machined titanium spindle to save more weight, they weigh in at 368g, saving around 100g compared to the Shimano XTR crankset.
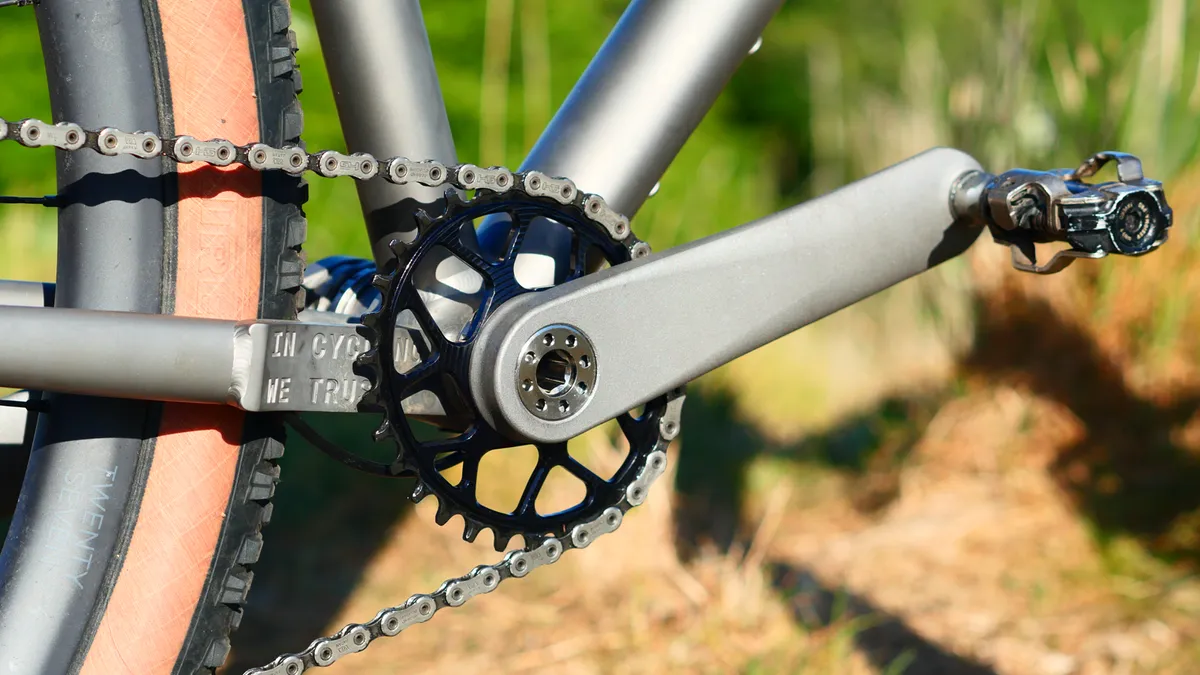
Sturdy uses an 8-bolt SRAM direct mount system and has its own matching Titanium chainrings. Due to the last-minute addition of the cranks to the build, I sourced a Works Components 30T oval chainring.
To match the drivetrain, I went for Shimano XTR 2-pot callipers paired with a 180 front and 160mm rear XTR Ice-Tech rotors. The brakes are one of the few parts, in retrospect, I would consider changing. There were a couple of descents where I yearned for the extra power and modulation that would have been on offer had I specced a 4-pot XTR calliper up front. Otherwise, they were flawless throughout the ride. Even in the super-wet and gritty conditions, I managed to get around the full route without needing to change the stock sintered brakepads.
Wheels, tyres and whether to insert or not to insert
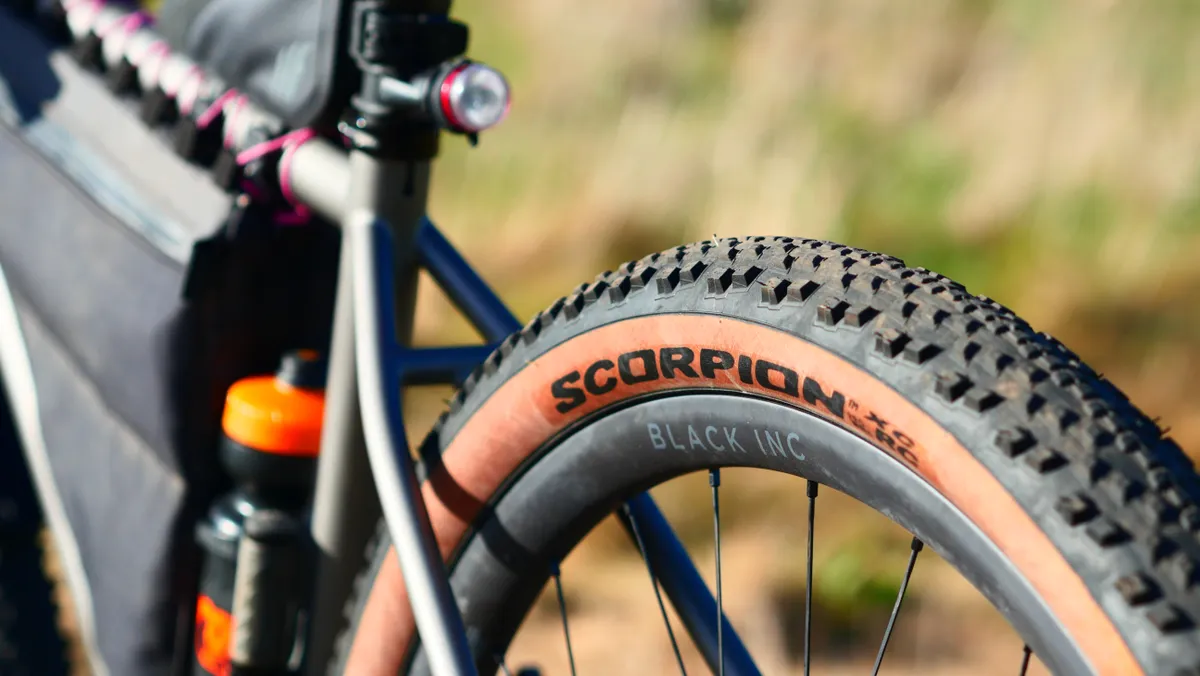
It's been a long time since I rode a MTB with an inner rim diameter narrower than 30mm, as this has become almost standard across all MTB disciplines. I opted to downsize my inner rim diameter because, although a narrower rim would reduce the tyre footprint and sacrifice a little traction, it should give the 2.4in wide Pirelli Scorpion RC tyres a slightly taller shape. I hoped this would give them the best chance of avoiding pinch punctures on the rocky terrain and square-edged drainage bars which litter the trails waiting to catch out tired riders.
I could have chosen to run an insert, and several HT550 veterans recommended I should. However, I felt that the added rolling resistance, weight and potential faff if I did puncture wasn’t worth it.
Black Inc’s Twenty Seven carbon wheelset fit the bill with a 27mm inner rim diameter, bladed spokes and ceramic bearings to ensure I was rolling along with maximum efficiency. I knew I would be strong on the descents, and despite not holding back, the Twenty Sevens were still running straight and true when I rolled into the finish. Not only that, but I didn't suffer a single puncture over the 900 km of racing, even with plenty of tired and clumsy line choices.
Finishing kit
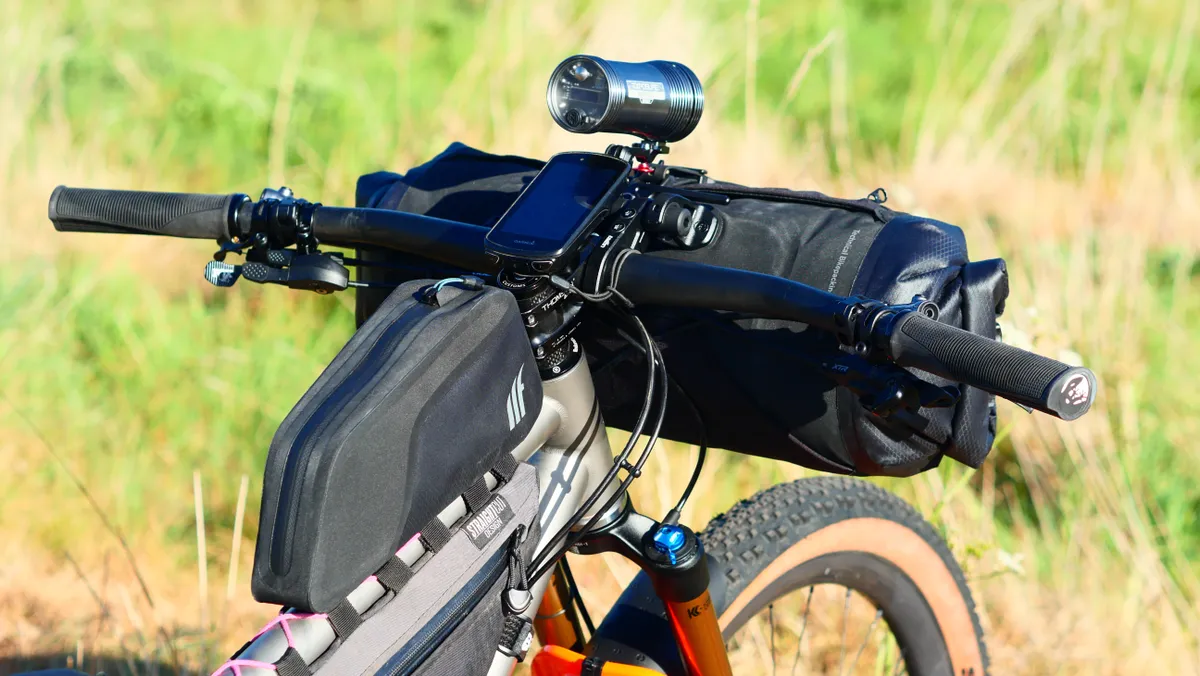
The SQ Labs 311 FL-X Carbon 16 is pretty radical compared to the majority of mountain bike handlebars, but the 16-degree sweep is a shape that I have really enjoyed riding. I find the hand position very comfortable without limiting control, and there is a noticeable level of vibration-smoothing compliance too. The 311 FL-X is SQ Labs' cross-country specific handlebar, and I specced the low-rise 15mm bar, leaving it uncut at 740mm.
I wasn’t intending on running the Fizik Tempo Argo R3 saddle; it was the saddle that was close to hand when I was building the bike. I have previously done some big days on it, so after some test riding, I decided to use it for the race.
Bikepacking bags
Having the best bikepacking bags is almost as important as the bike spec. Being able to securely carry everything you need, especially when riding in the mountains, is vital. Rather than go into a full breakdown of everything I packed, here are the key items.
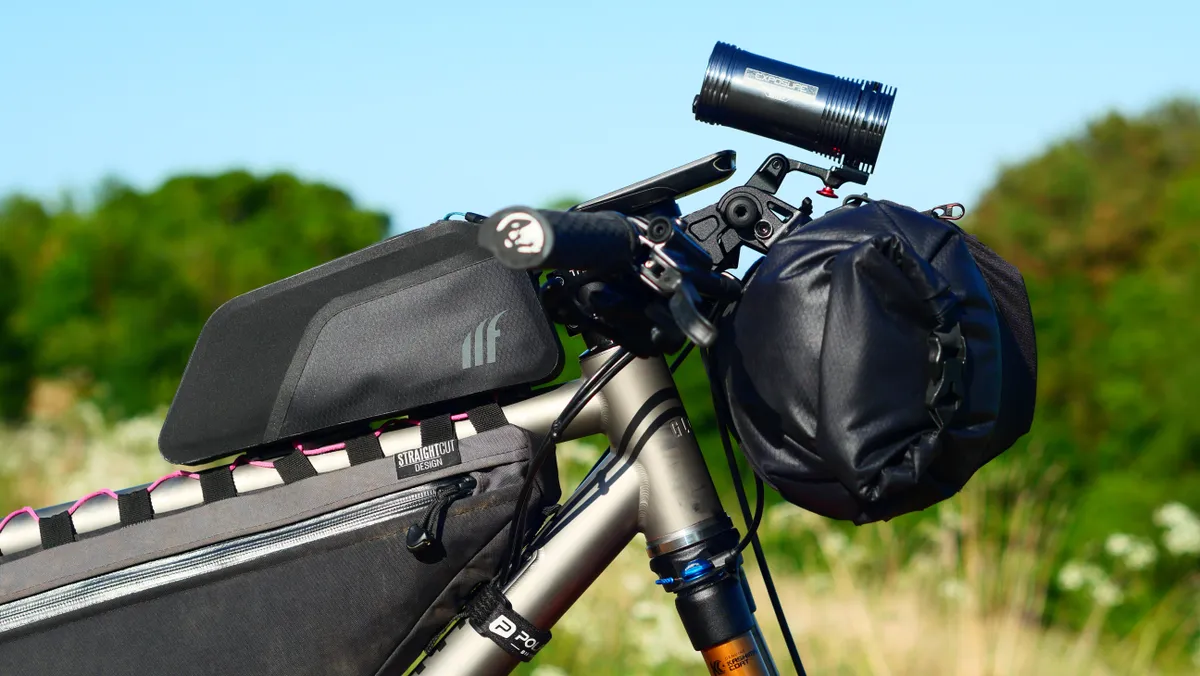
At the centre of the setup is a Straightcut Design framebag, which was custom-made for a previous bikepacking bike but conveniently fitted the Gloria too. It is a direct mount bag, so it needed a little bit of customisation to mount it to the bottle cage bolts of the new bike. In the bottom compartment of the frame bag, I stored all my tools and spares to keep the heaviest items low down. I used the top compartment to store my bivy bag and some food.
Tailfin kindly supplied the top tube bags and handlebar bag. The bolt-on handlebar mounting system clamps to the handlebar to provide a very secure platform. I chose the small flat-bar version, it has a 14.9L capacity, which was more than enough to swallow up my sleeping bag, mat, puffer jacket, spare bibsorts and some other bits and bobs. I really liked the four mesh front pockets too, which provided convenient storage for easy-to-reach snacks. The Bar Bag System also solved my light mounting conundrum, as I could use the built-in GoPro mount to attach my Exposure Maxx D light in the optimum position. This main light was supplemented with a helmet-mounted Exposure Zenith, which I used for technical trails at night.
I used two top tube bags with the front one storing my battery pack, enabling me to charge items on the go, and I kept toiletries in the rear bag.
With the frame bag, I was able to run a bottle mounted to the frame, which I used for carb mix, and I supplemented this with a hydration vest. I chose the Restrap Race Hydration Vest as it has a good amount of internal storage, a low profile and a good range of pockets built into the straps. This was also where I kept my waterproof jacket and trousers on the rare occasion I wasn’t wearing them.
The perfect setup
In the run-up to the HT550, Scotland saw a long spell of dry, warm weather, and I had originally intended a far more lightweight setup. It’s said that you pack your fears, and while I don’t regret everything I brought, the stormy weather report had me worried. Lack of experience with the course also encouraged me to stay on the safe side, as I didn’t want to find myself caught out in the mountains and having to scratch from the race due to poor kit choices. Had the weather forecast not been so grim, I may have been a bit braver.
With a few changes to my sleep system, I could have safely gone lighter without sacrificing comfort. Trimming down my sleep setup would have not only saved weight but also made the bike more balanced, as I could have reduced the size of my handlebar bag. This streamlined bag layout would have been considerably more aero, saving energy on some of the road and block headwind sections.
I finished in 4 days and 13 minutes. Could this have been enough to slip under my four-day goal? Quite likely, but my primary aim was to finish confidently rather than purely chasing the clock.

Graham has been part of the Cyclingnews team since January 2020. He has mountain biking at his core and can mostly be found bikepacking around Scotland or exploring the steep trails around the Tweed Valley. Not afraid of a challenge, Graham has gained a reputation for riding fixed gear bikes both too far and often in inappropriate places.
You must confirm your public display name before commenting
Please logout and then login again, you will then be prompted to enter your display name.
