Autumn is here, and depending on where you live in the world the days are getting shorter and the mornings and evenings are darker. For me, at home in the UK, I now leave the house in the dark to make my early Saturday morning chaingang.
Winter riding means lights; in fact, all year-round riding means bike lights, but it’s the wintertime when cyclists reach for them out of necessity. The best bike lights will help you see in the dark, and they will also keep you more visible to other road users and motorists and ultimately safer.
Sometimes, putting a set of lights onto your bike isn’t the most aesthetically pleasing option, though it depends on the bike and the lights. But in the context of looking at a nice, sleek road or gravel bike, strapping lights on, especially when they are bigger and bulkier, doesn't look quite as good.
Article continues below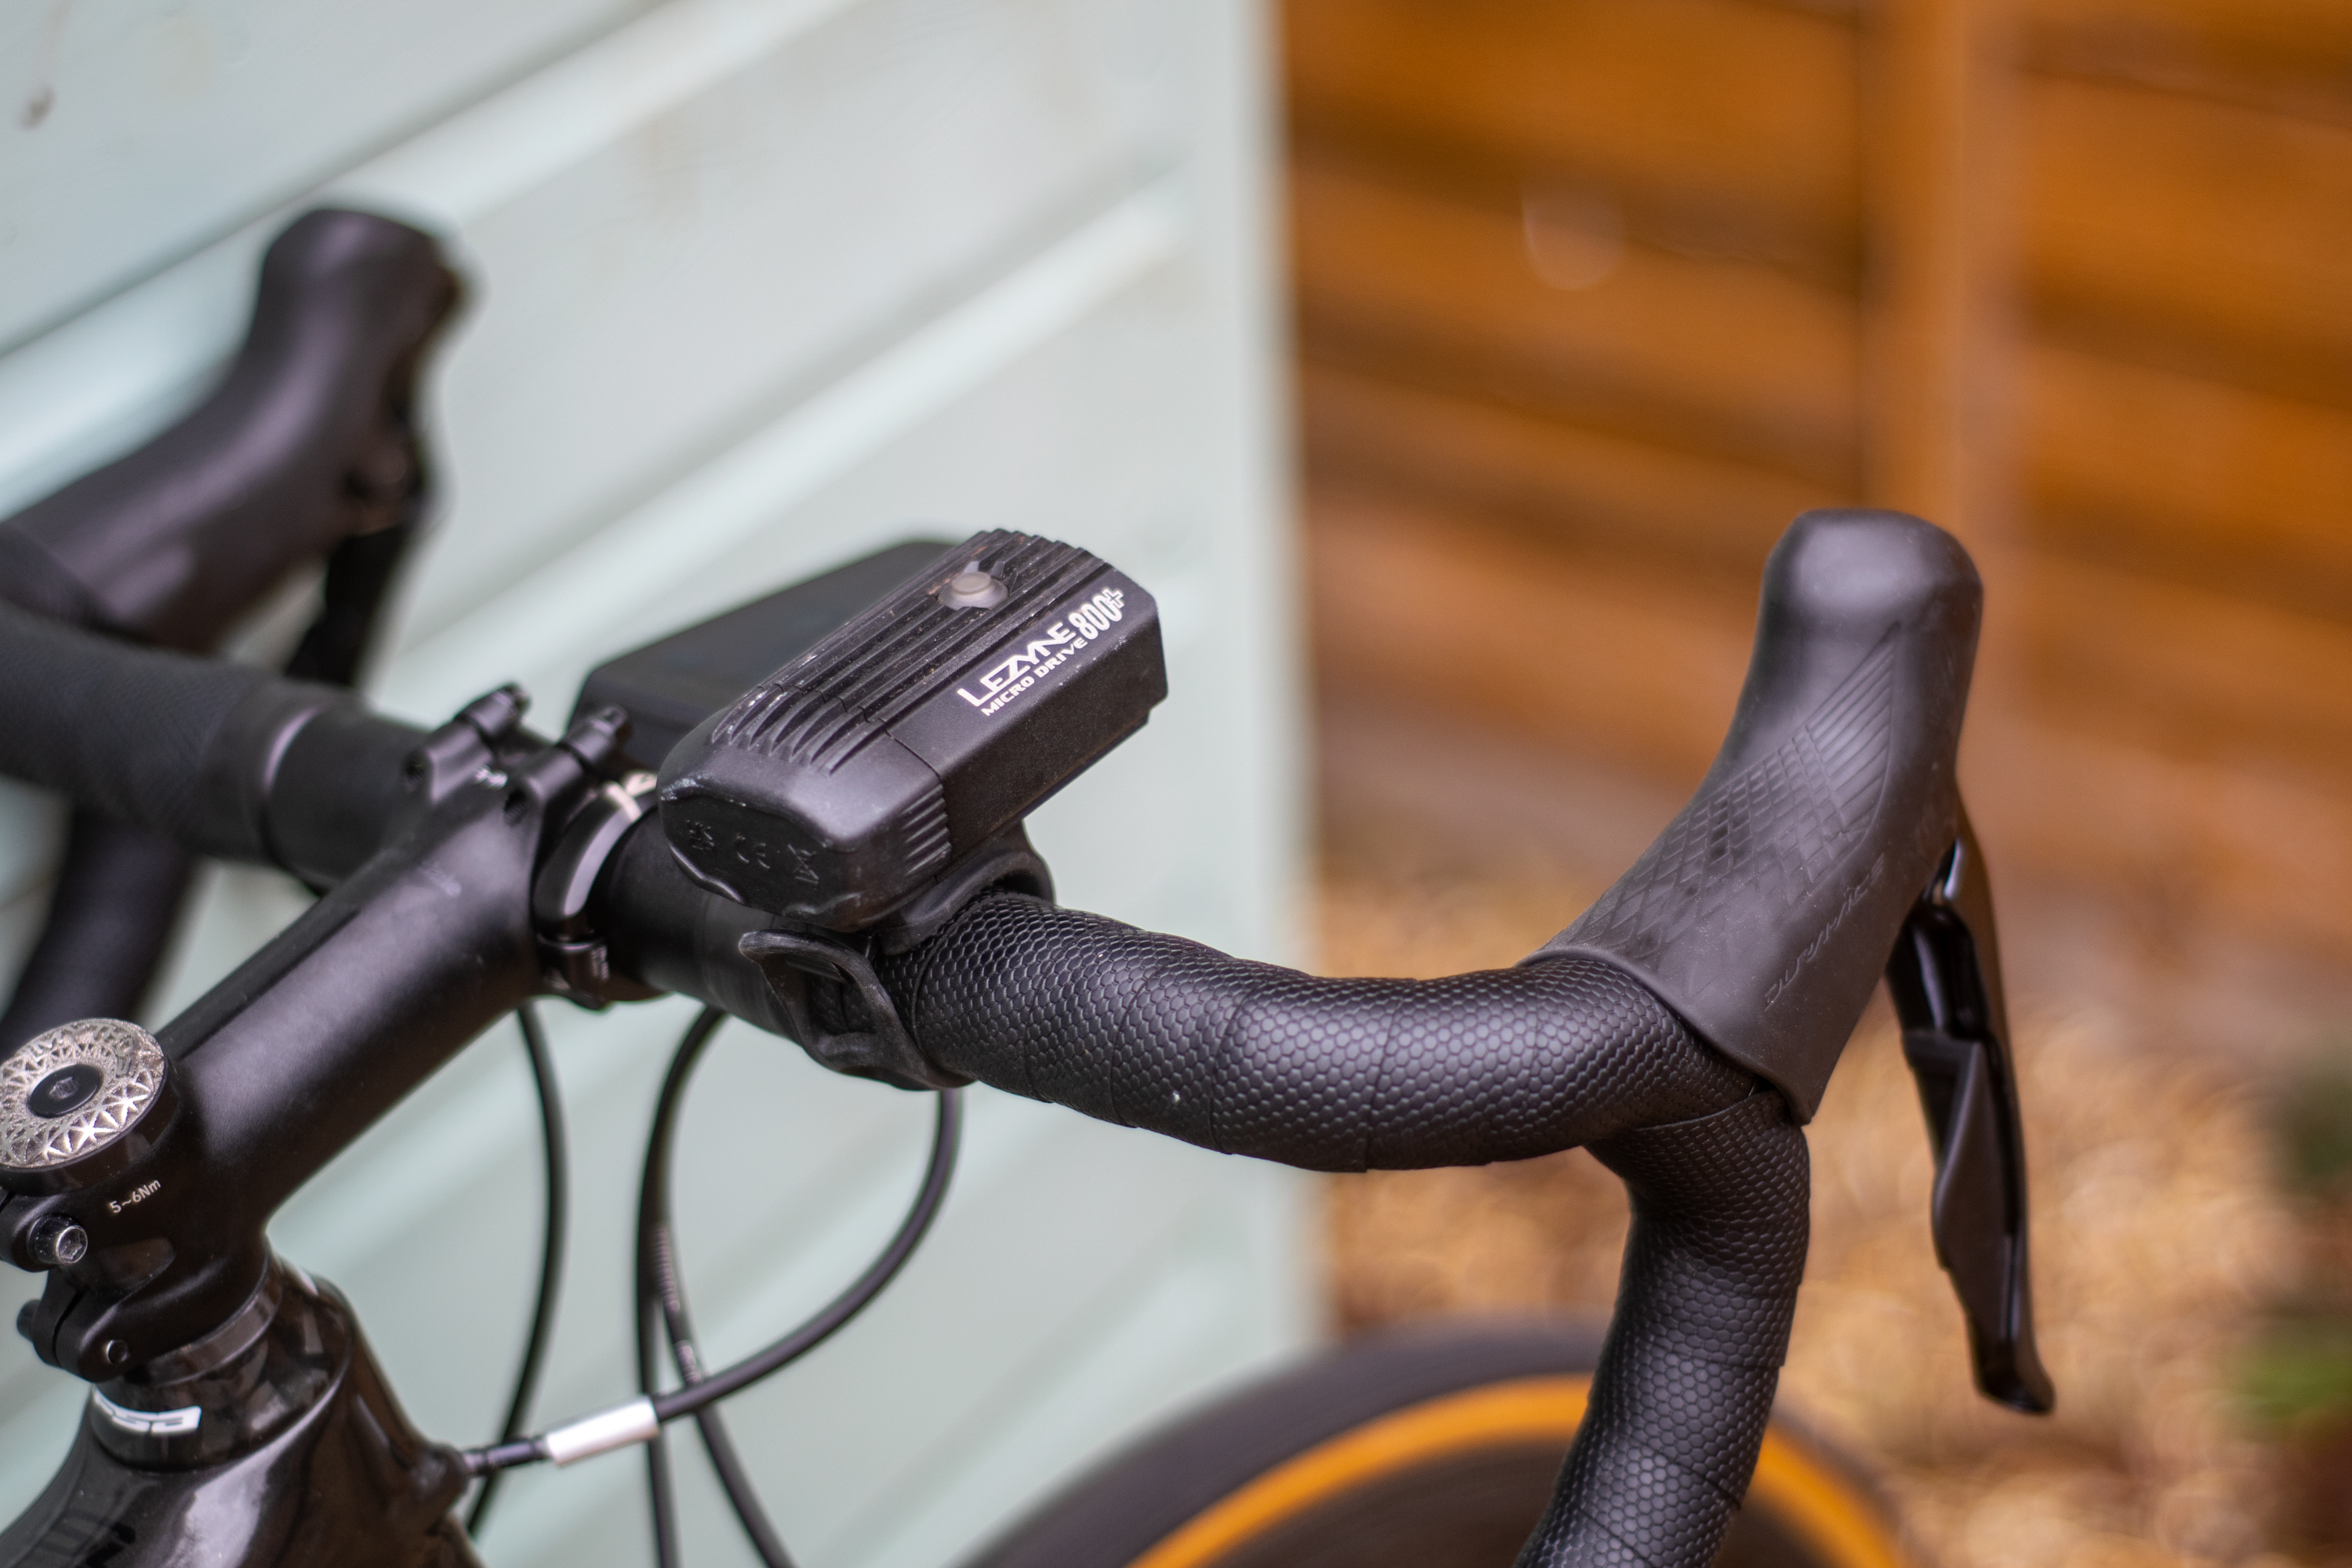
So, how can you achieve a clean light setup? You might be thinking, ‘Easy, just buy an out-front Garmin mount adaptor and/or a 3D printer,’ and you would be right, but there's more to it than that.
I’ve examined several key ways you can achieve a neat and even super clean light setup on your bike. If you're interested in moving that big, bulky front light sitting front and centre on your handlebars and just making things a bit cleaner, this guide should help, and at minimum give you some ideas and inspiration.
I've spent my fair share of winters, rushing back in for lights on my way out of the house to ride, and then just slapping them on the bike, but with a bit of planning and creativity, you can take things to the next level.
Clean things up with your computer mount

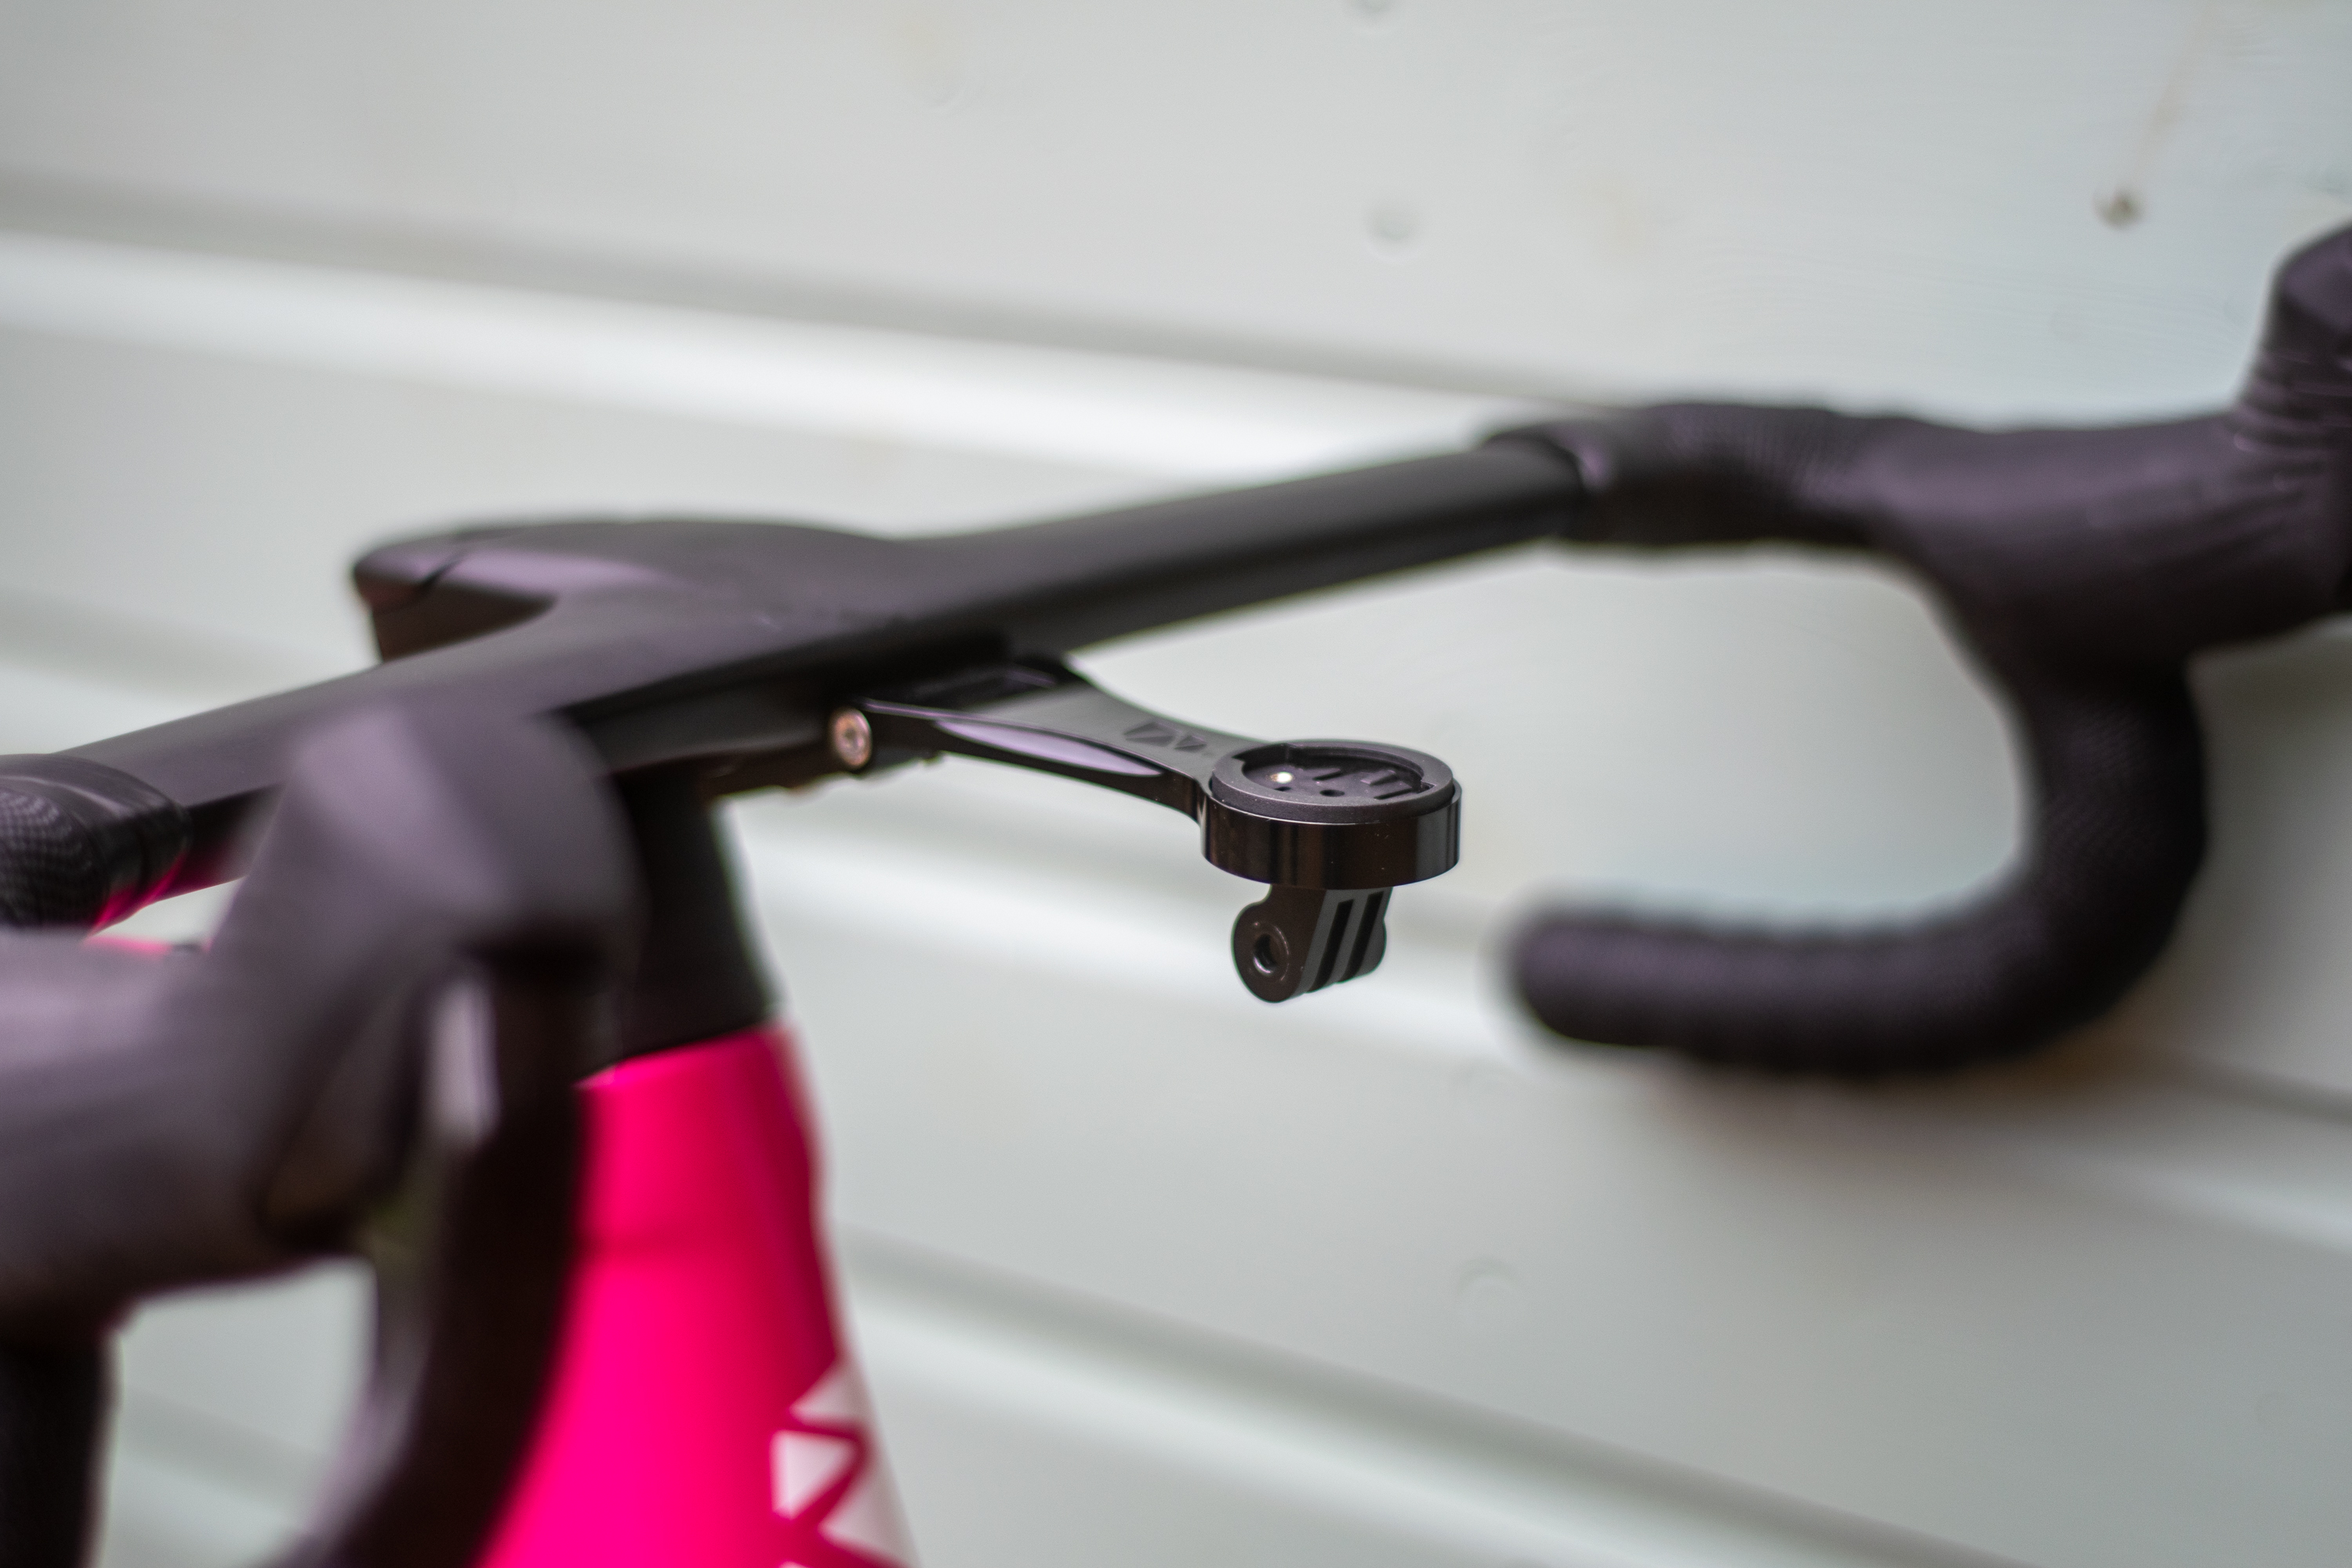
Moving a light off your handlebars and under them by using an adaptor paired to an out-front computer mount is one of the easiest and now most common ways to achieve a clean front light setup.
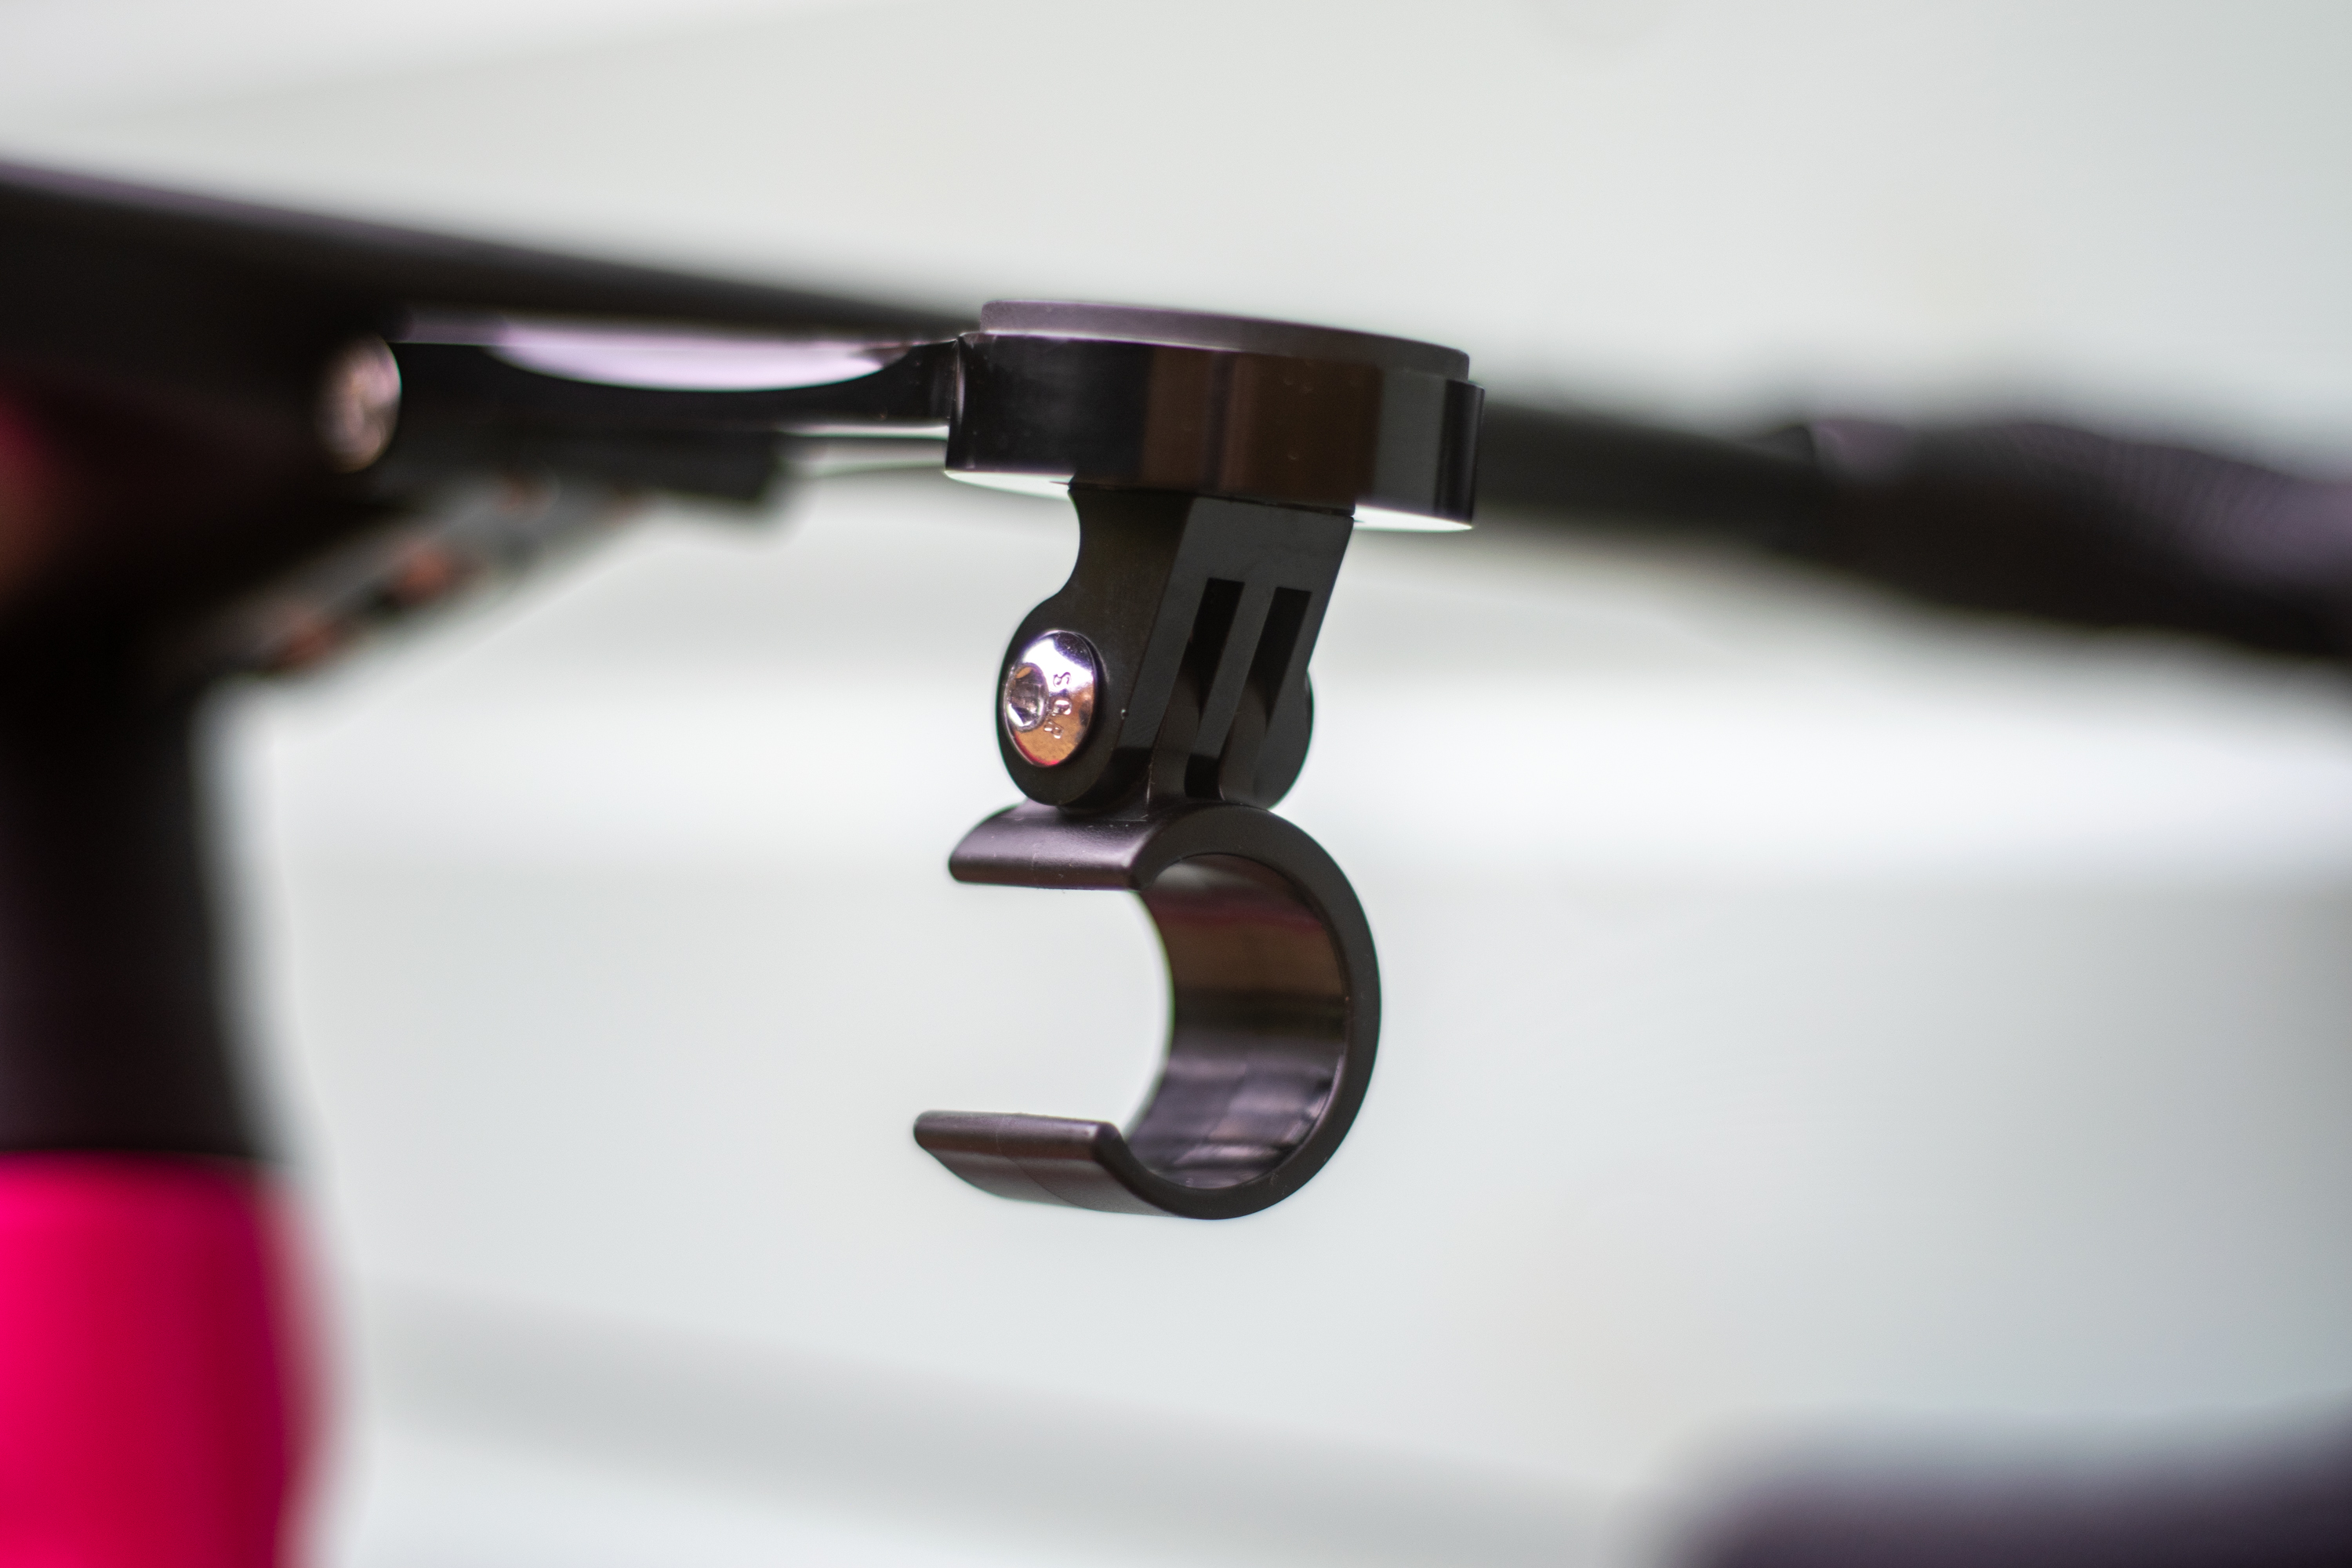
Many of the best bike computer mounts can now make use of a three-prong GoPro-style adaptor – which has pretty much become the universally adopted standard – to accommodate a light (though other brands have their own mount systems too), meaning you can affix your light underneath the mount for a much cleaner look.
There are a couple of ways to do this; buy yourself an out-front mount with a GoPro-style fitting built in underneath, or find a GoPro mount to fit to your existing computer mount, then find the corresponding light mount. Bolt the two together, fit the light, and you're done.
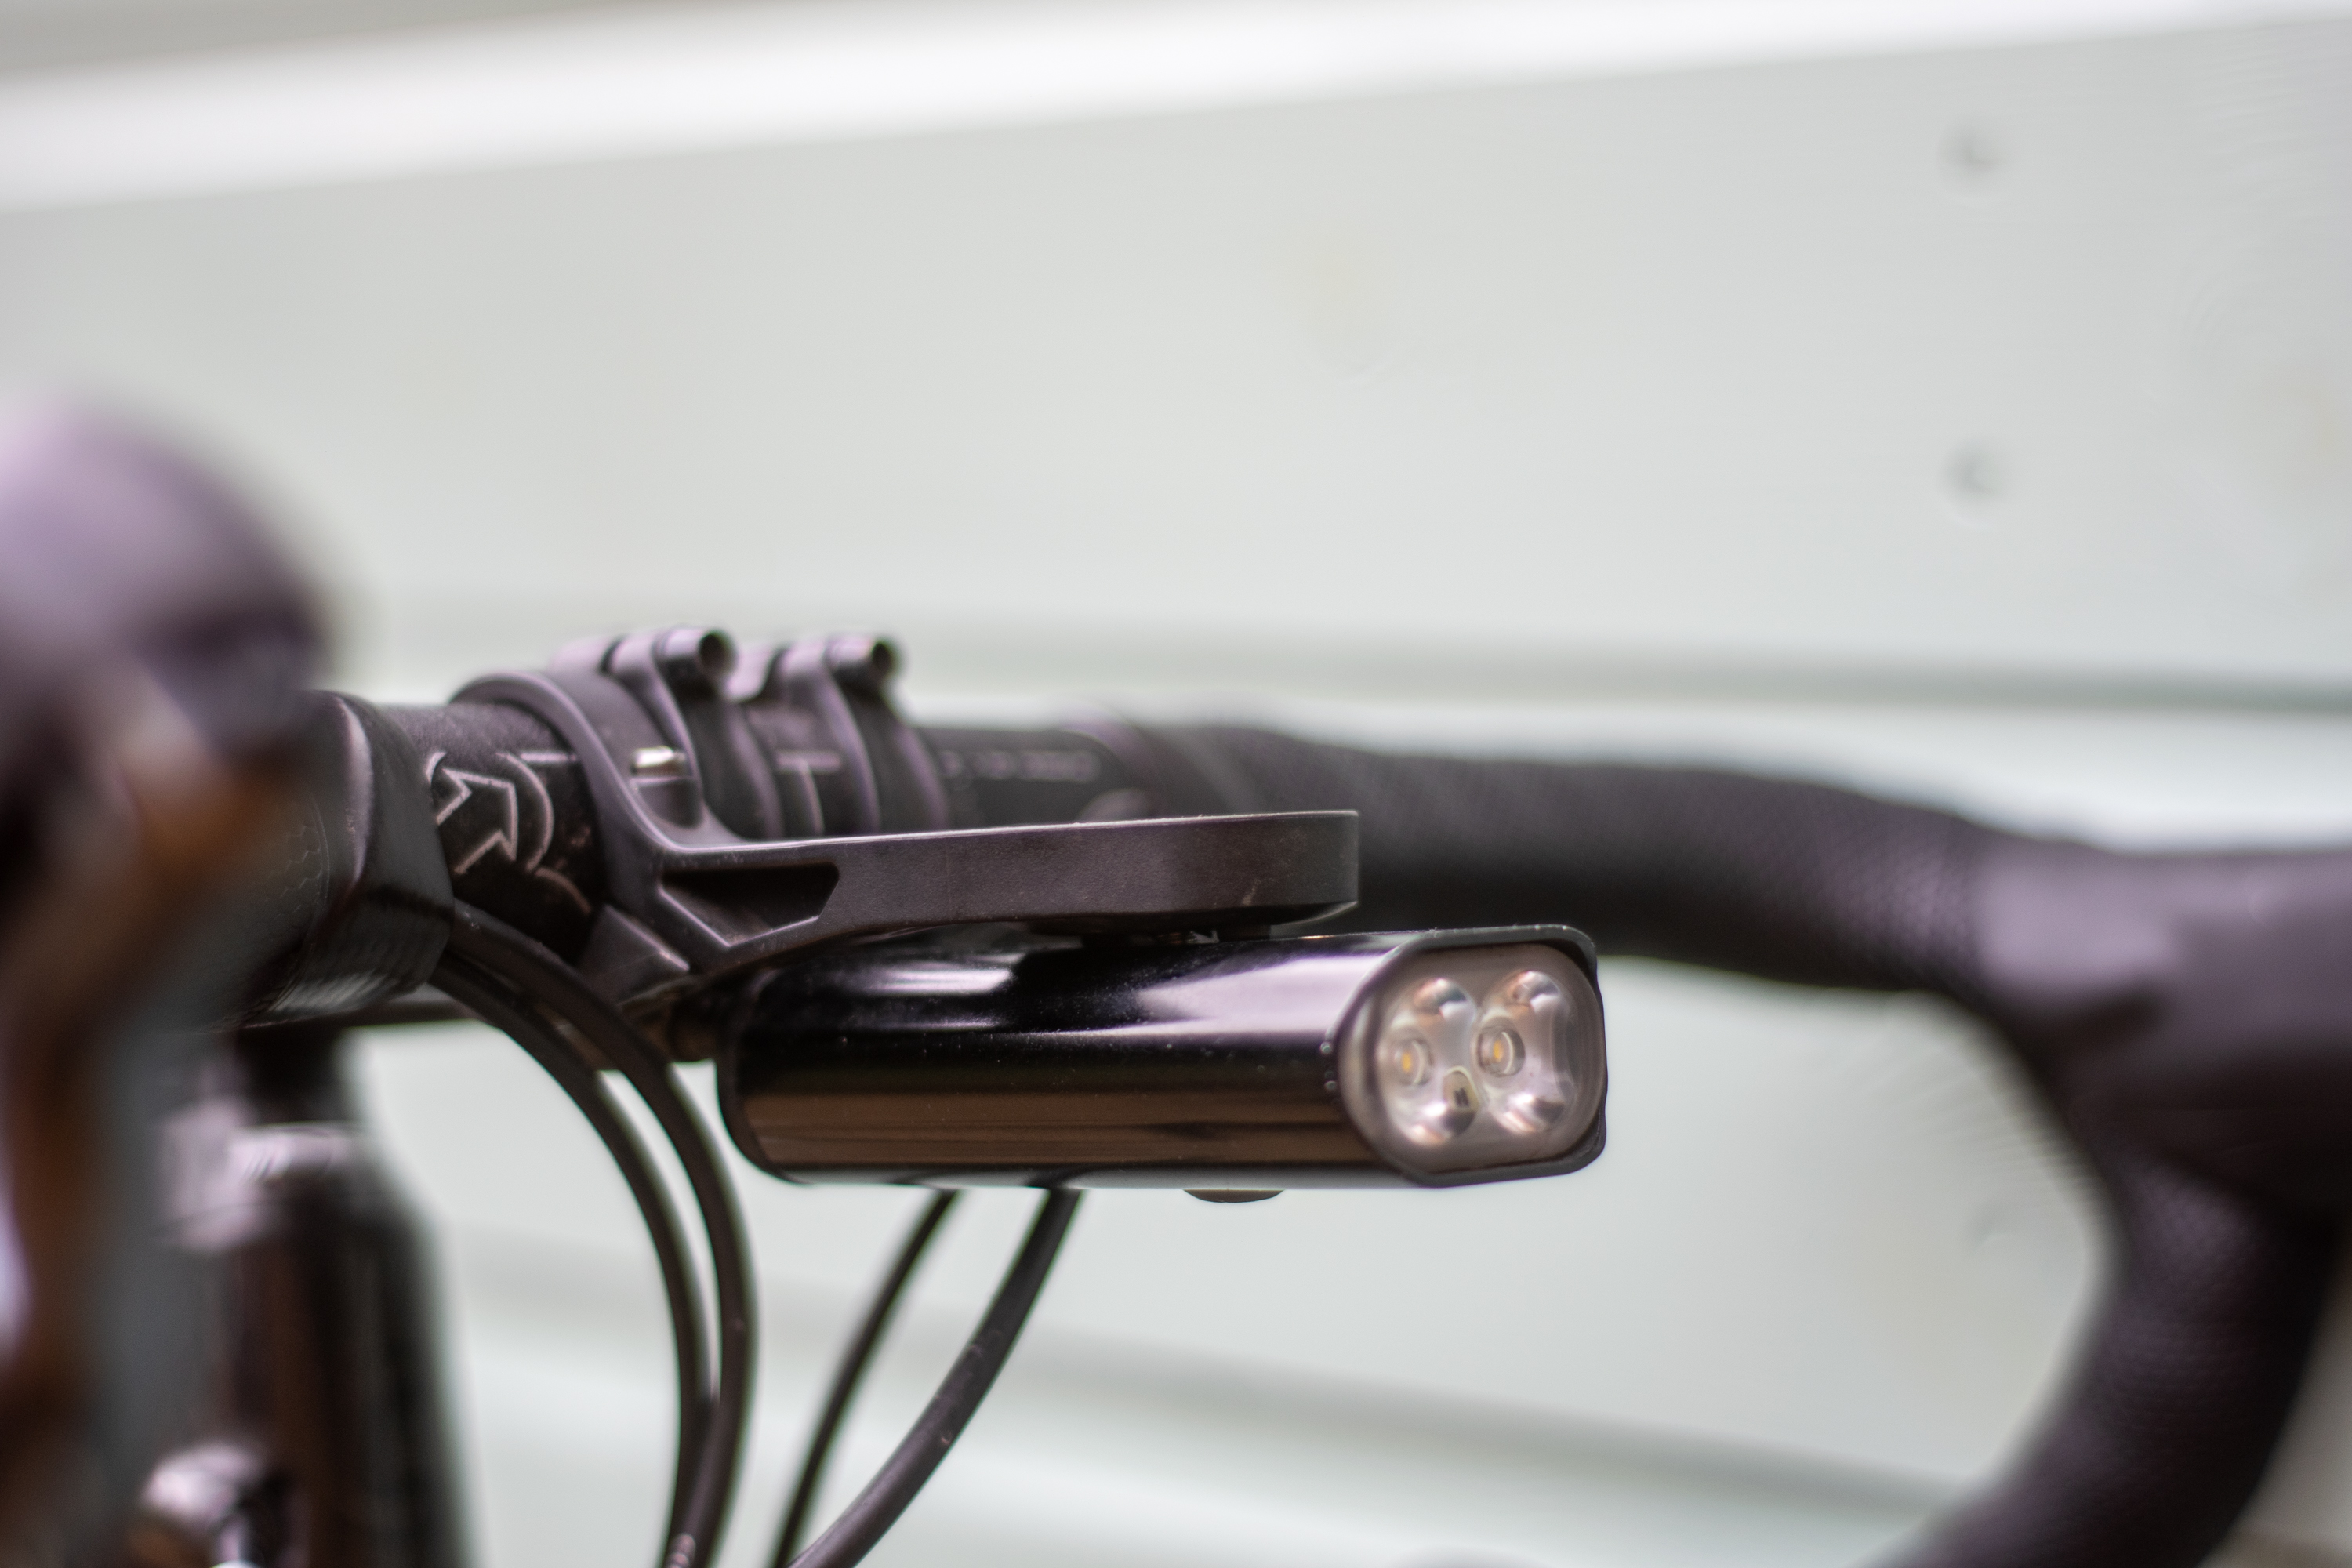
For instance, in the picture below, I've used the stock Ribble Ultra Grit out front mount that happily comes with an integrated GoPro adaptor, and then paired it with the Exposure Boost2 light using the Exposure Side Entry Clip (sold separately), which the light simply snaps into, resulting in a neat, clean, out front setup.
Now that this has become more common, many smart bike lights now have remote functionality, so you can control the light from your bars without having to fiddle around underneath.
Some bike brands' integrated handlebar computer mounts will vary, and you may need to find an aftermarket mount to meet your requirements, but there's so much on the market now that it shouldn't be too difficult. American brand K-Edge, for instance, makes high-quality aftermarket combo mounts for a range of brands.
Plenty of light companies now make adaptor brackets and mounts, allowing you to mount your lights to a computer. As long as you have a computer mount with a three-prong adaptor, a cheap adaptor bracket will be all you need.
There are lots of companies dedicated to producing aftermarket light mounts now for all kinds of mount and light pairings. Companies like RaceWare components and MagCad make a huge range of aftermarket 3D printed mounts for a range of lights.
So, if you want to easily clean up that front end, get yourself a computer mount with a GoPro-style adaptor, and the corresponding bracket or adaptor for your particular light.

Tidying up rear lights
Front lights get most of the attention when it comes to neatening things up because there's just more scope to move them out of the way and off your handlebars, but there are still things that can be done to tidy rear lights a little more. There's more on this below.
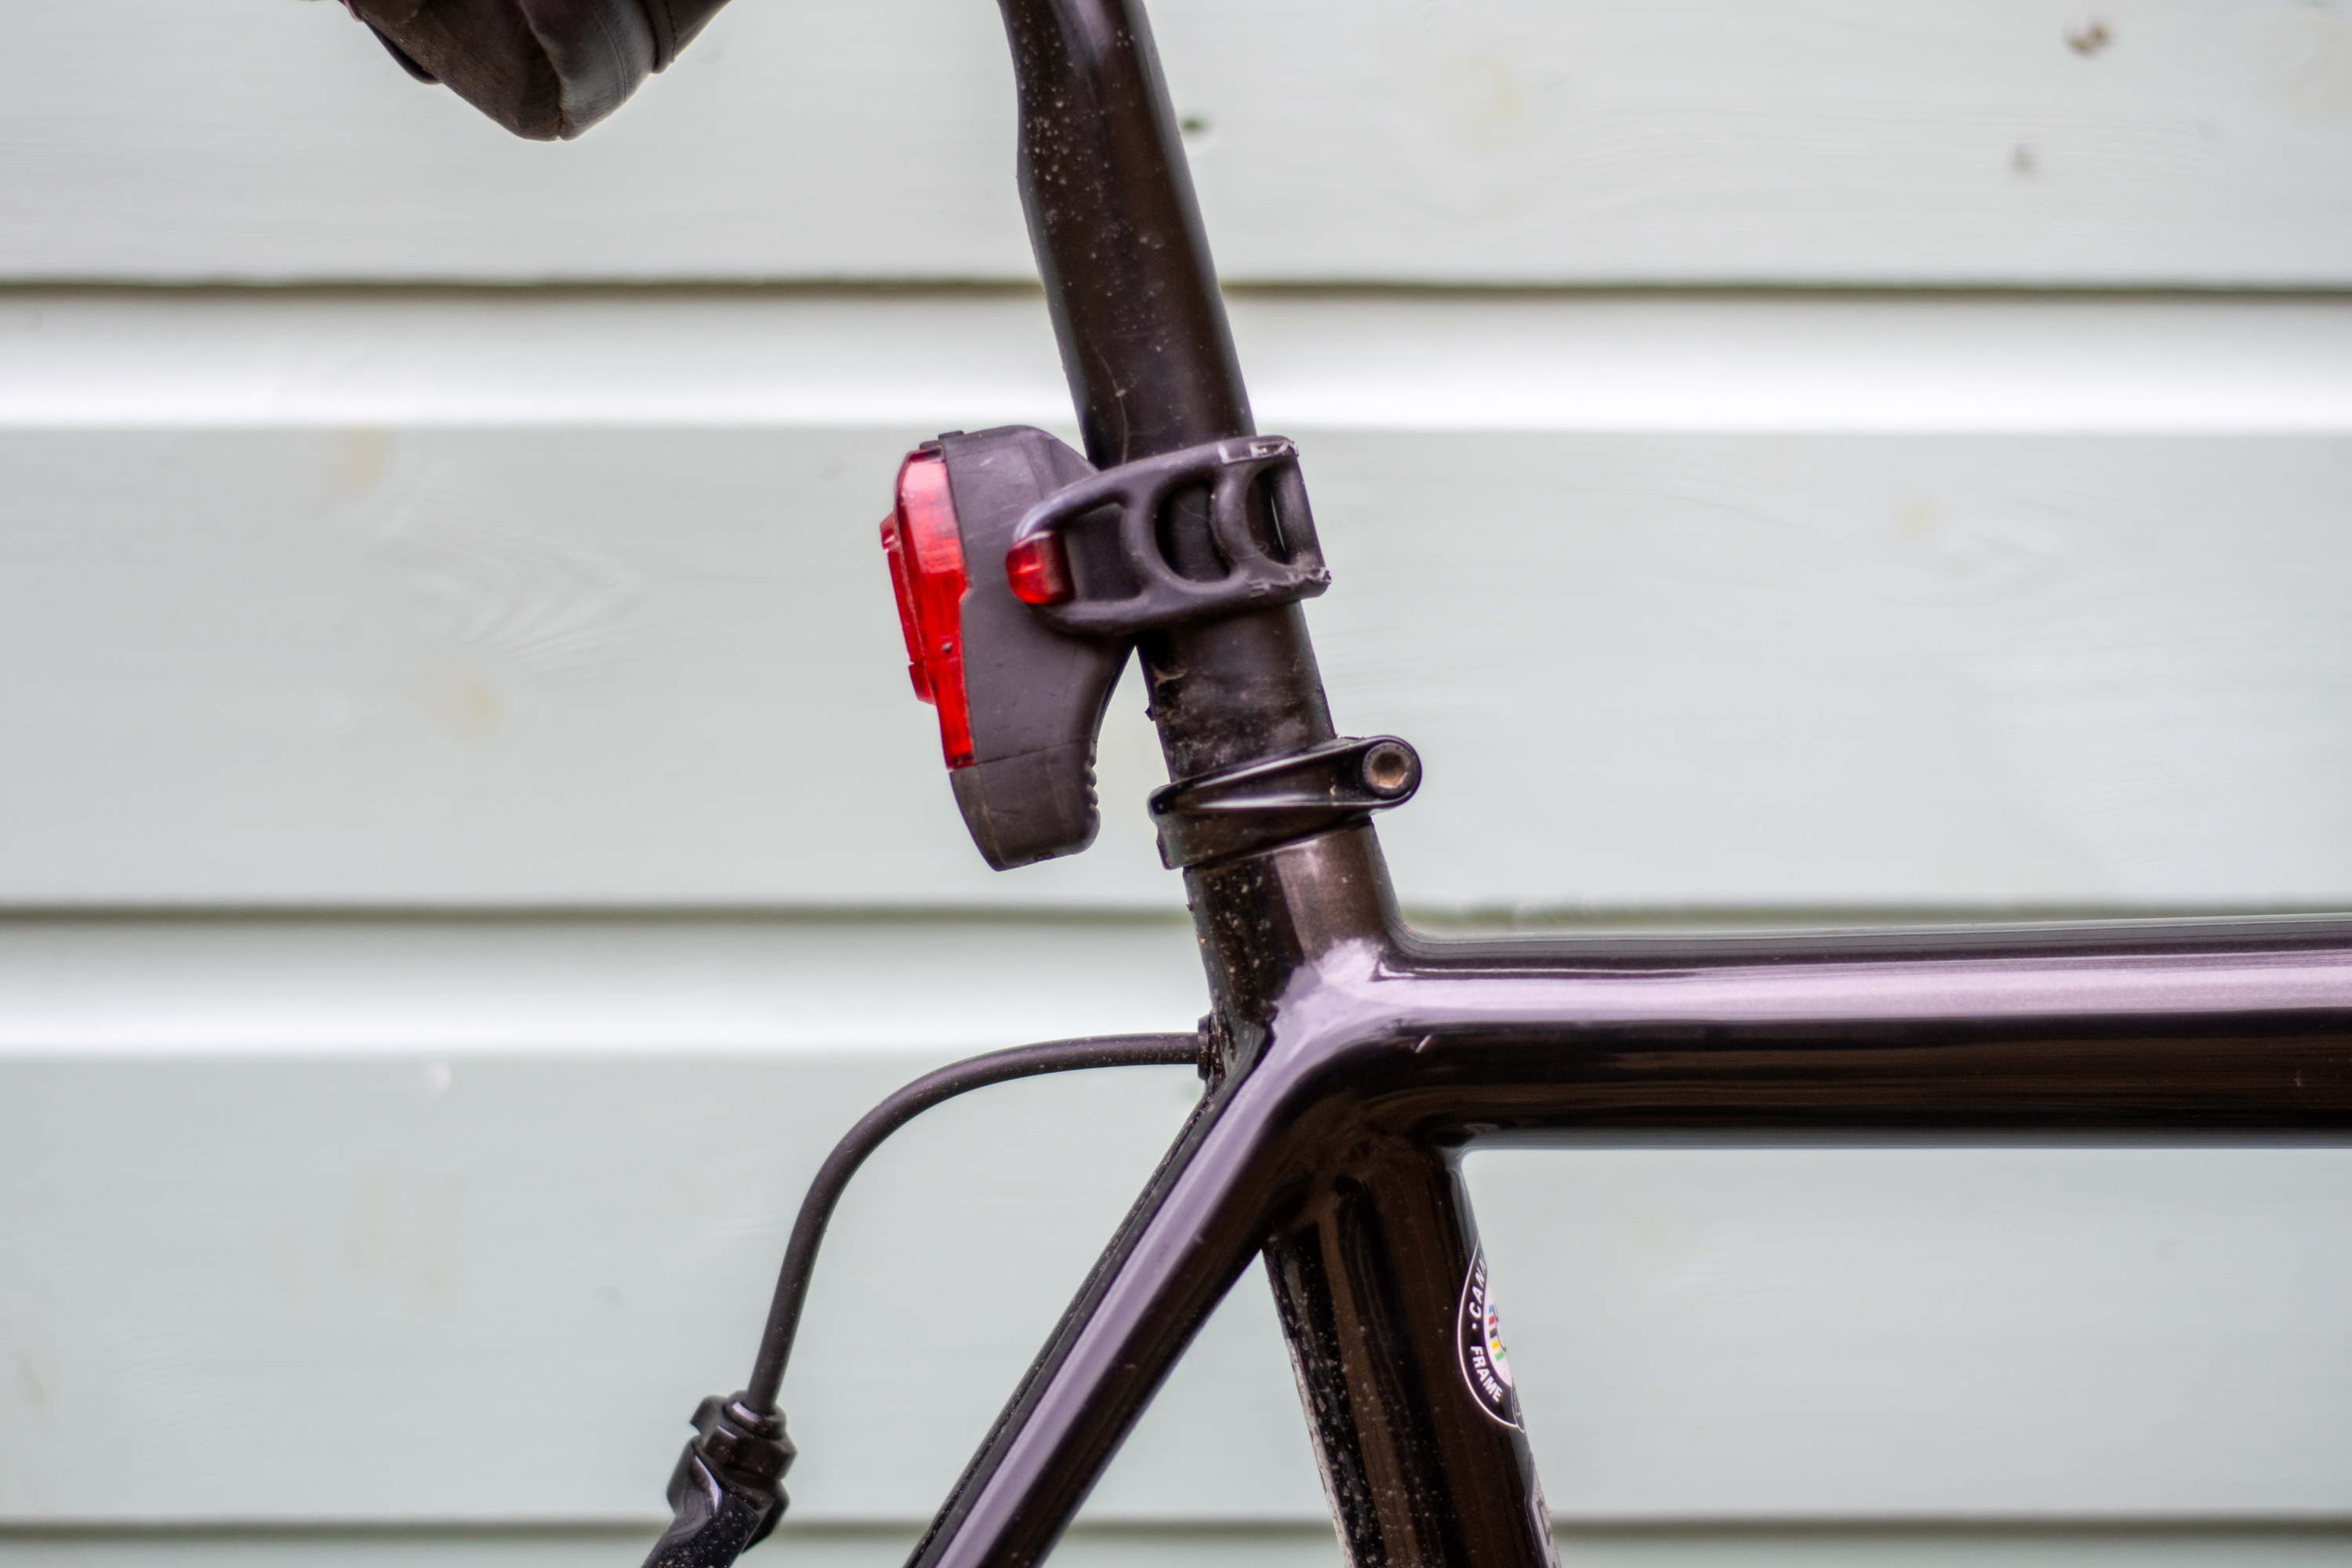
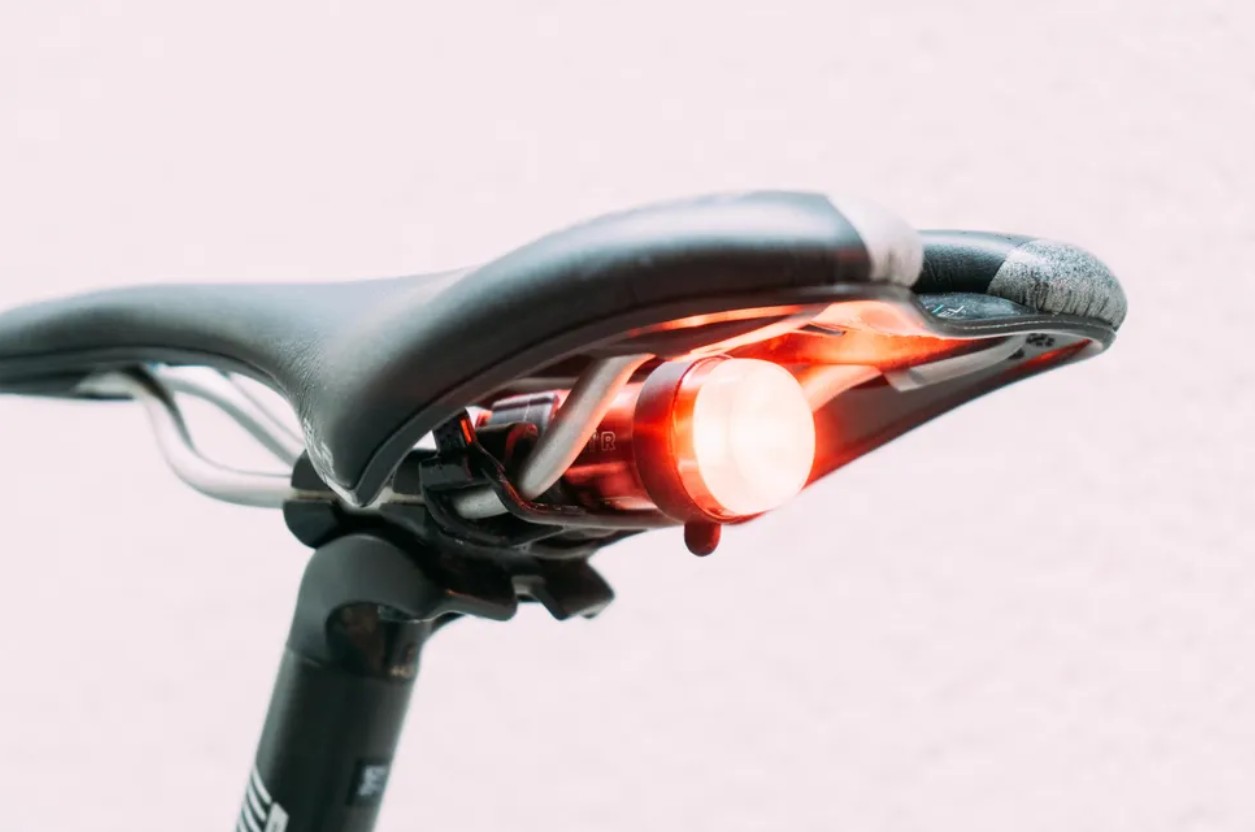
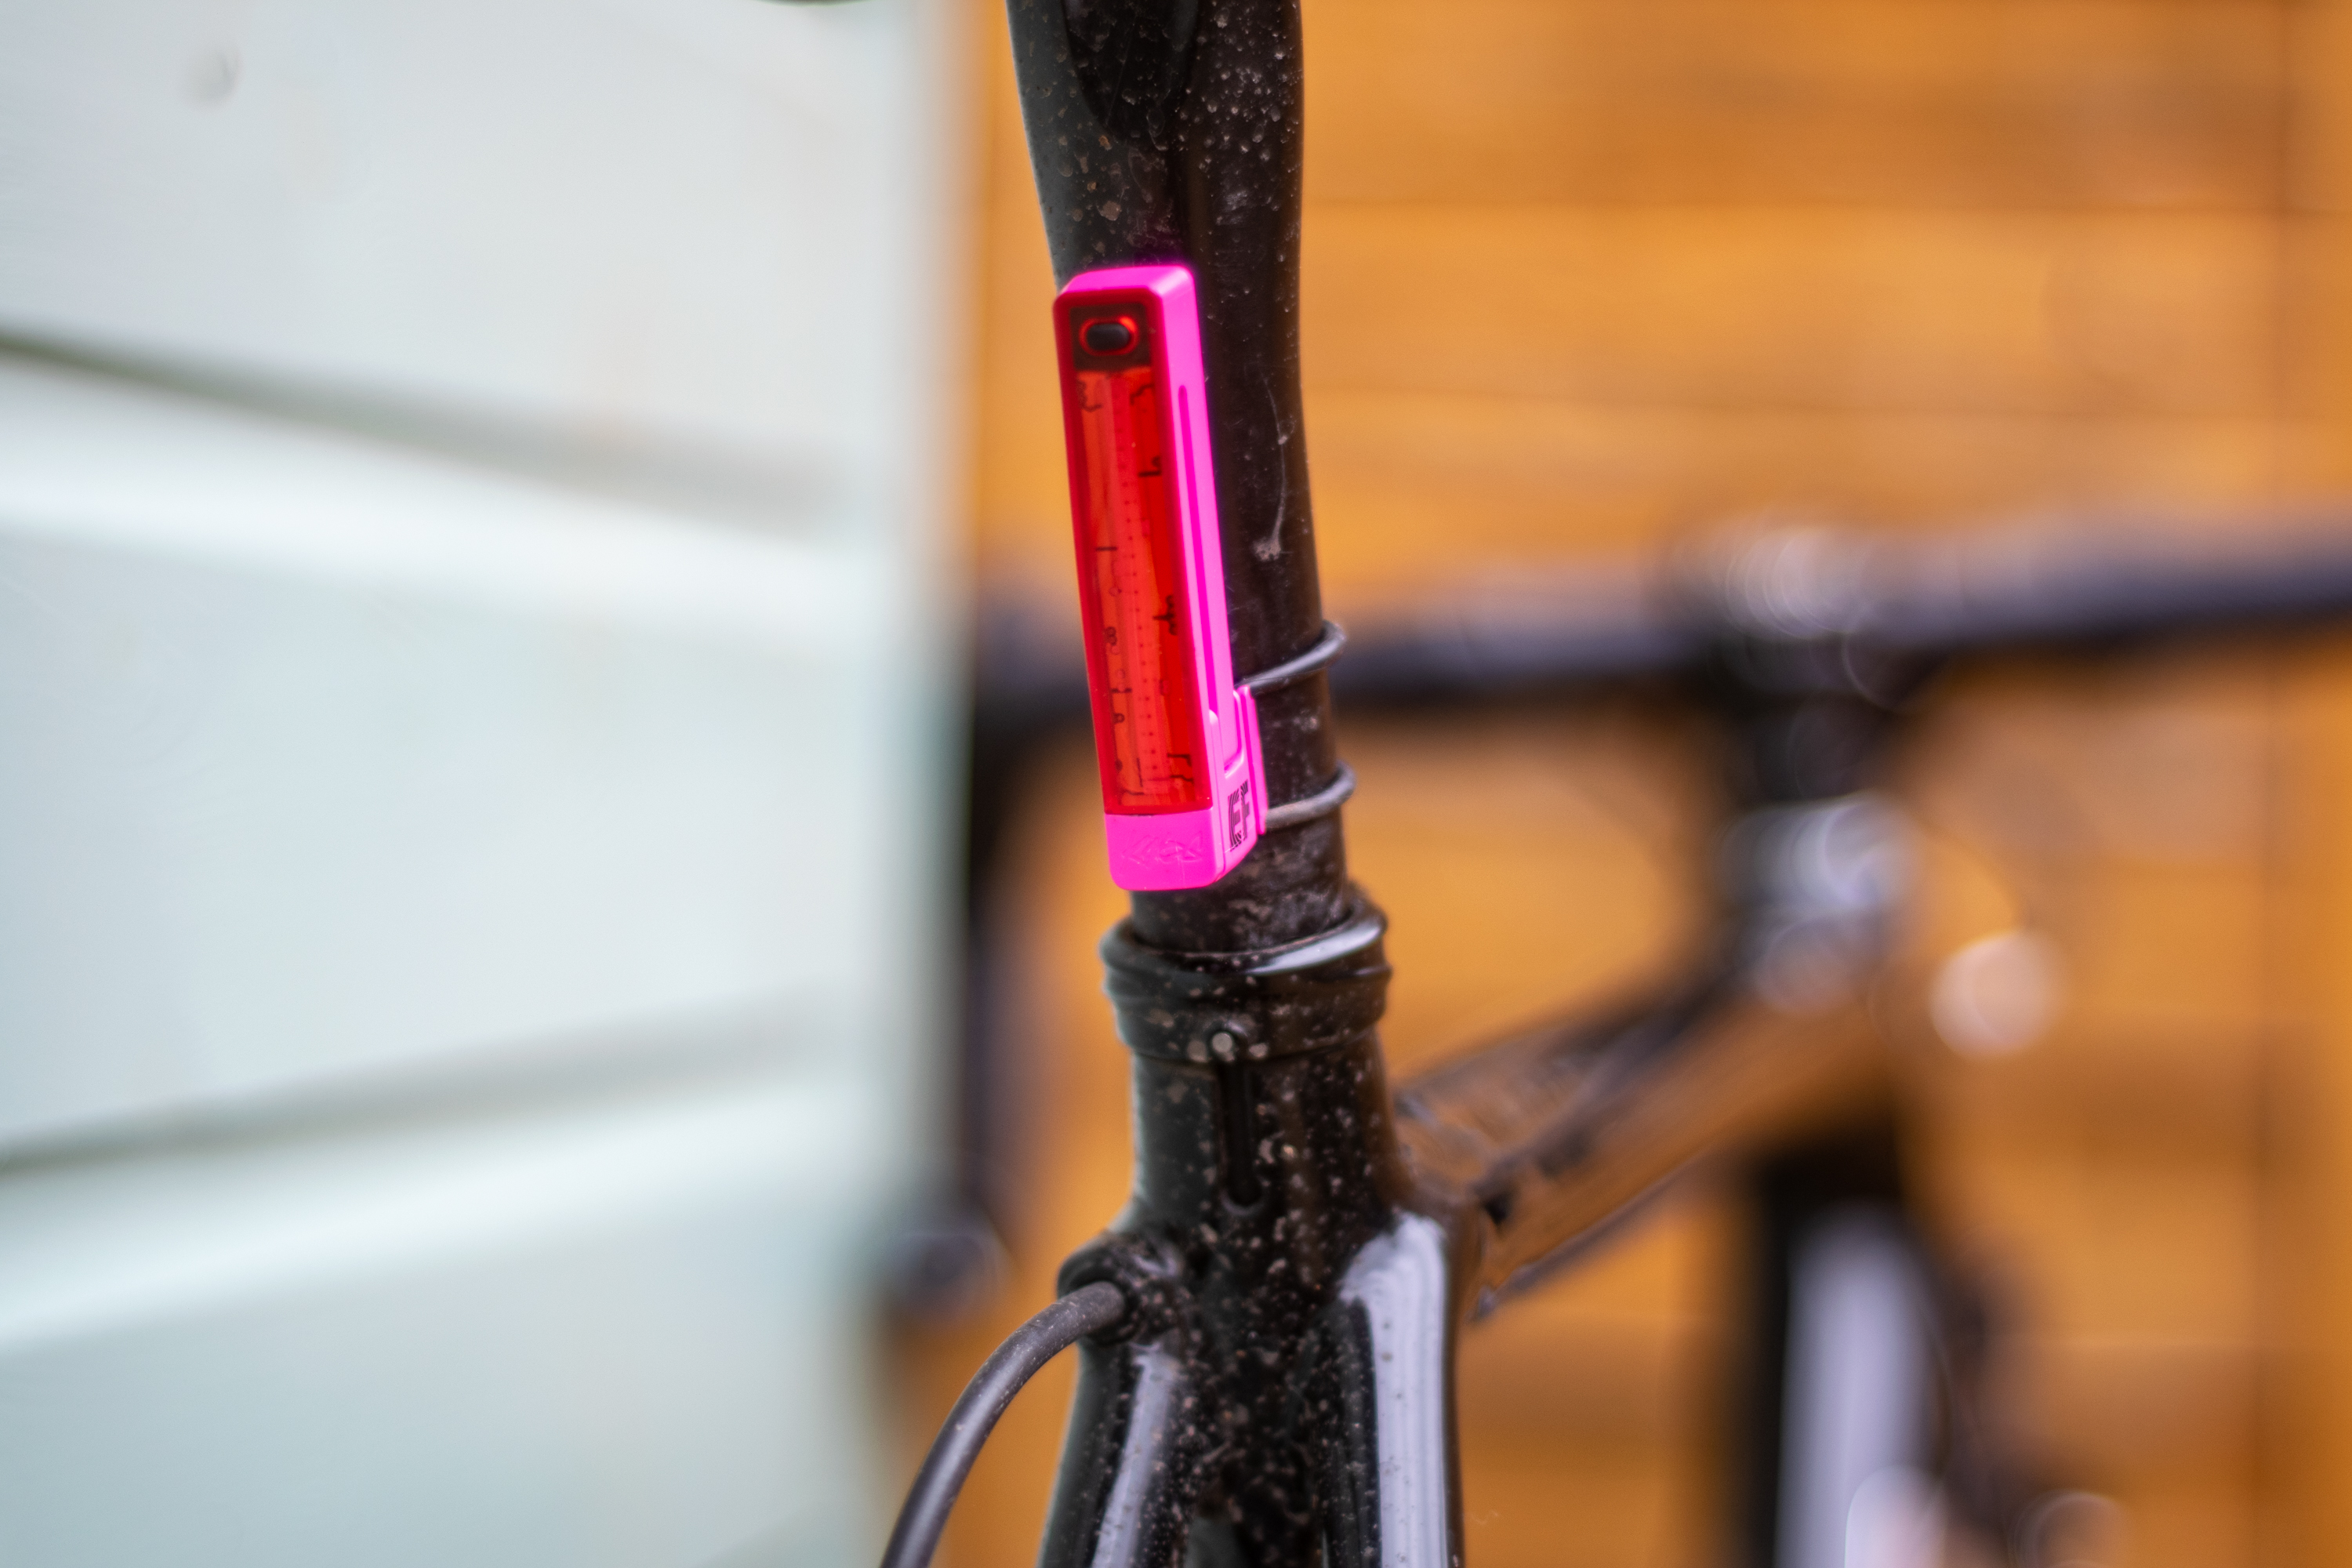
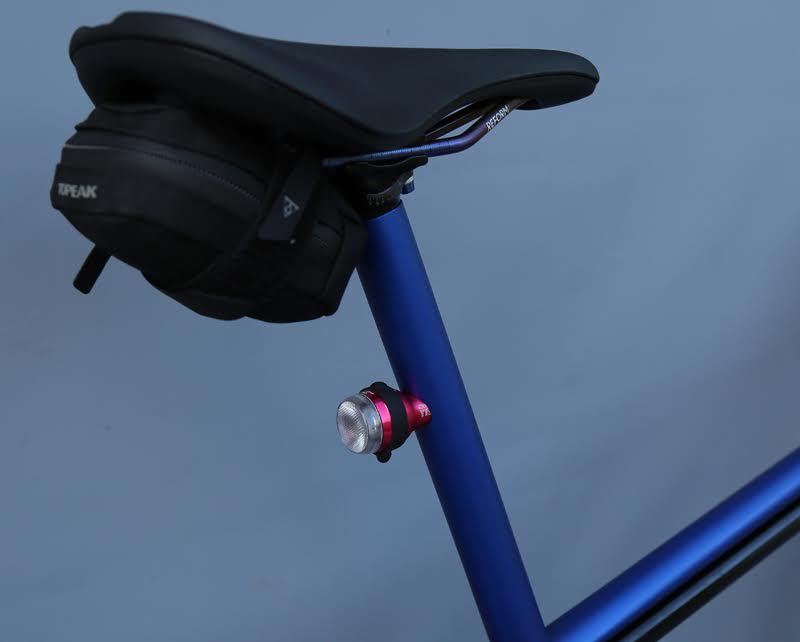
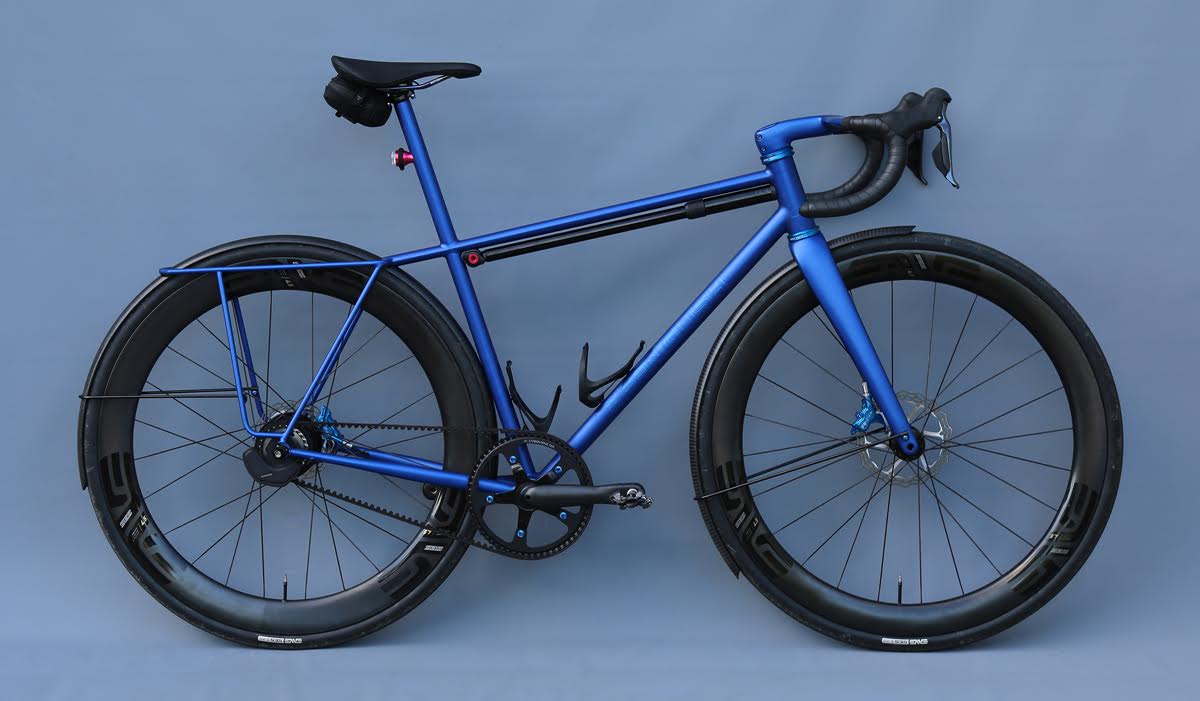
First, it's an obvious one and will depend on what you require from your lights, but a slimmed-down, smaller light like the Knog Plus above can help clear things up. It's only 17 grams and sits perfectly behind my seatpost, and crucially, still packs a punch. I tend to just use it riding solo, as on constant beam, which is what I would set it to in a group to respect my riding mates, the battery will only last two hours.
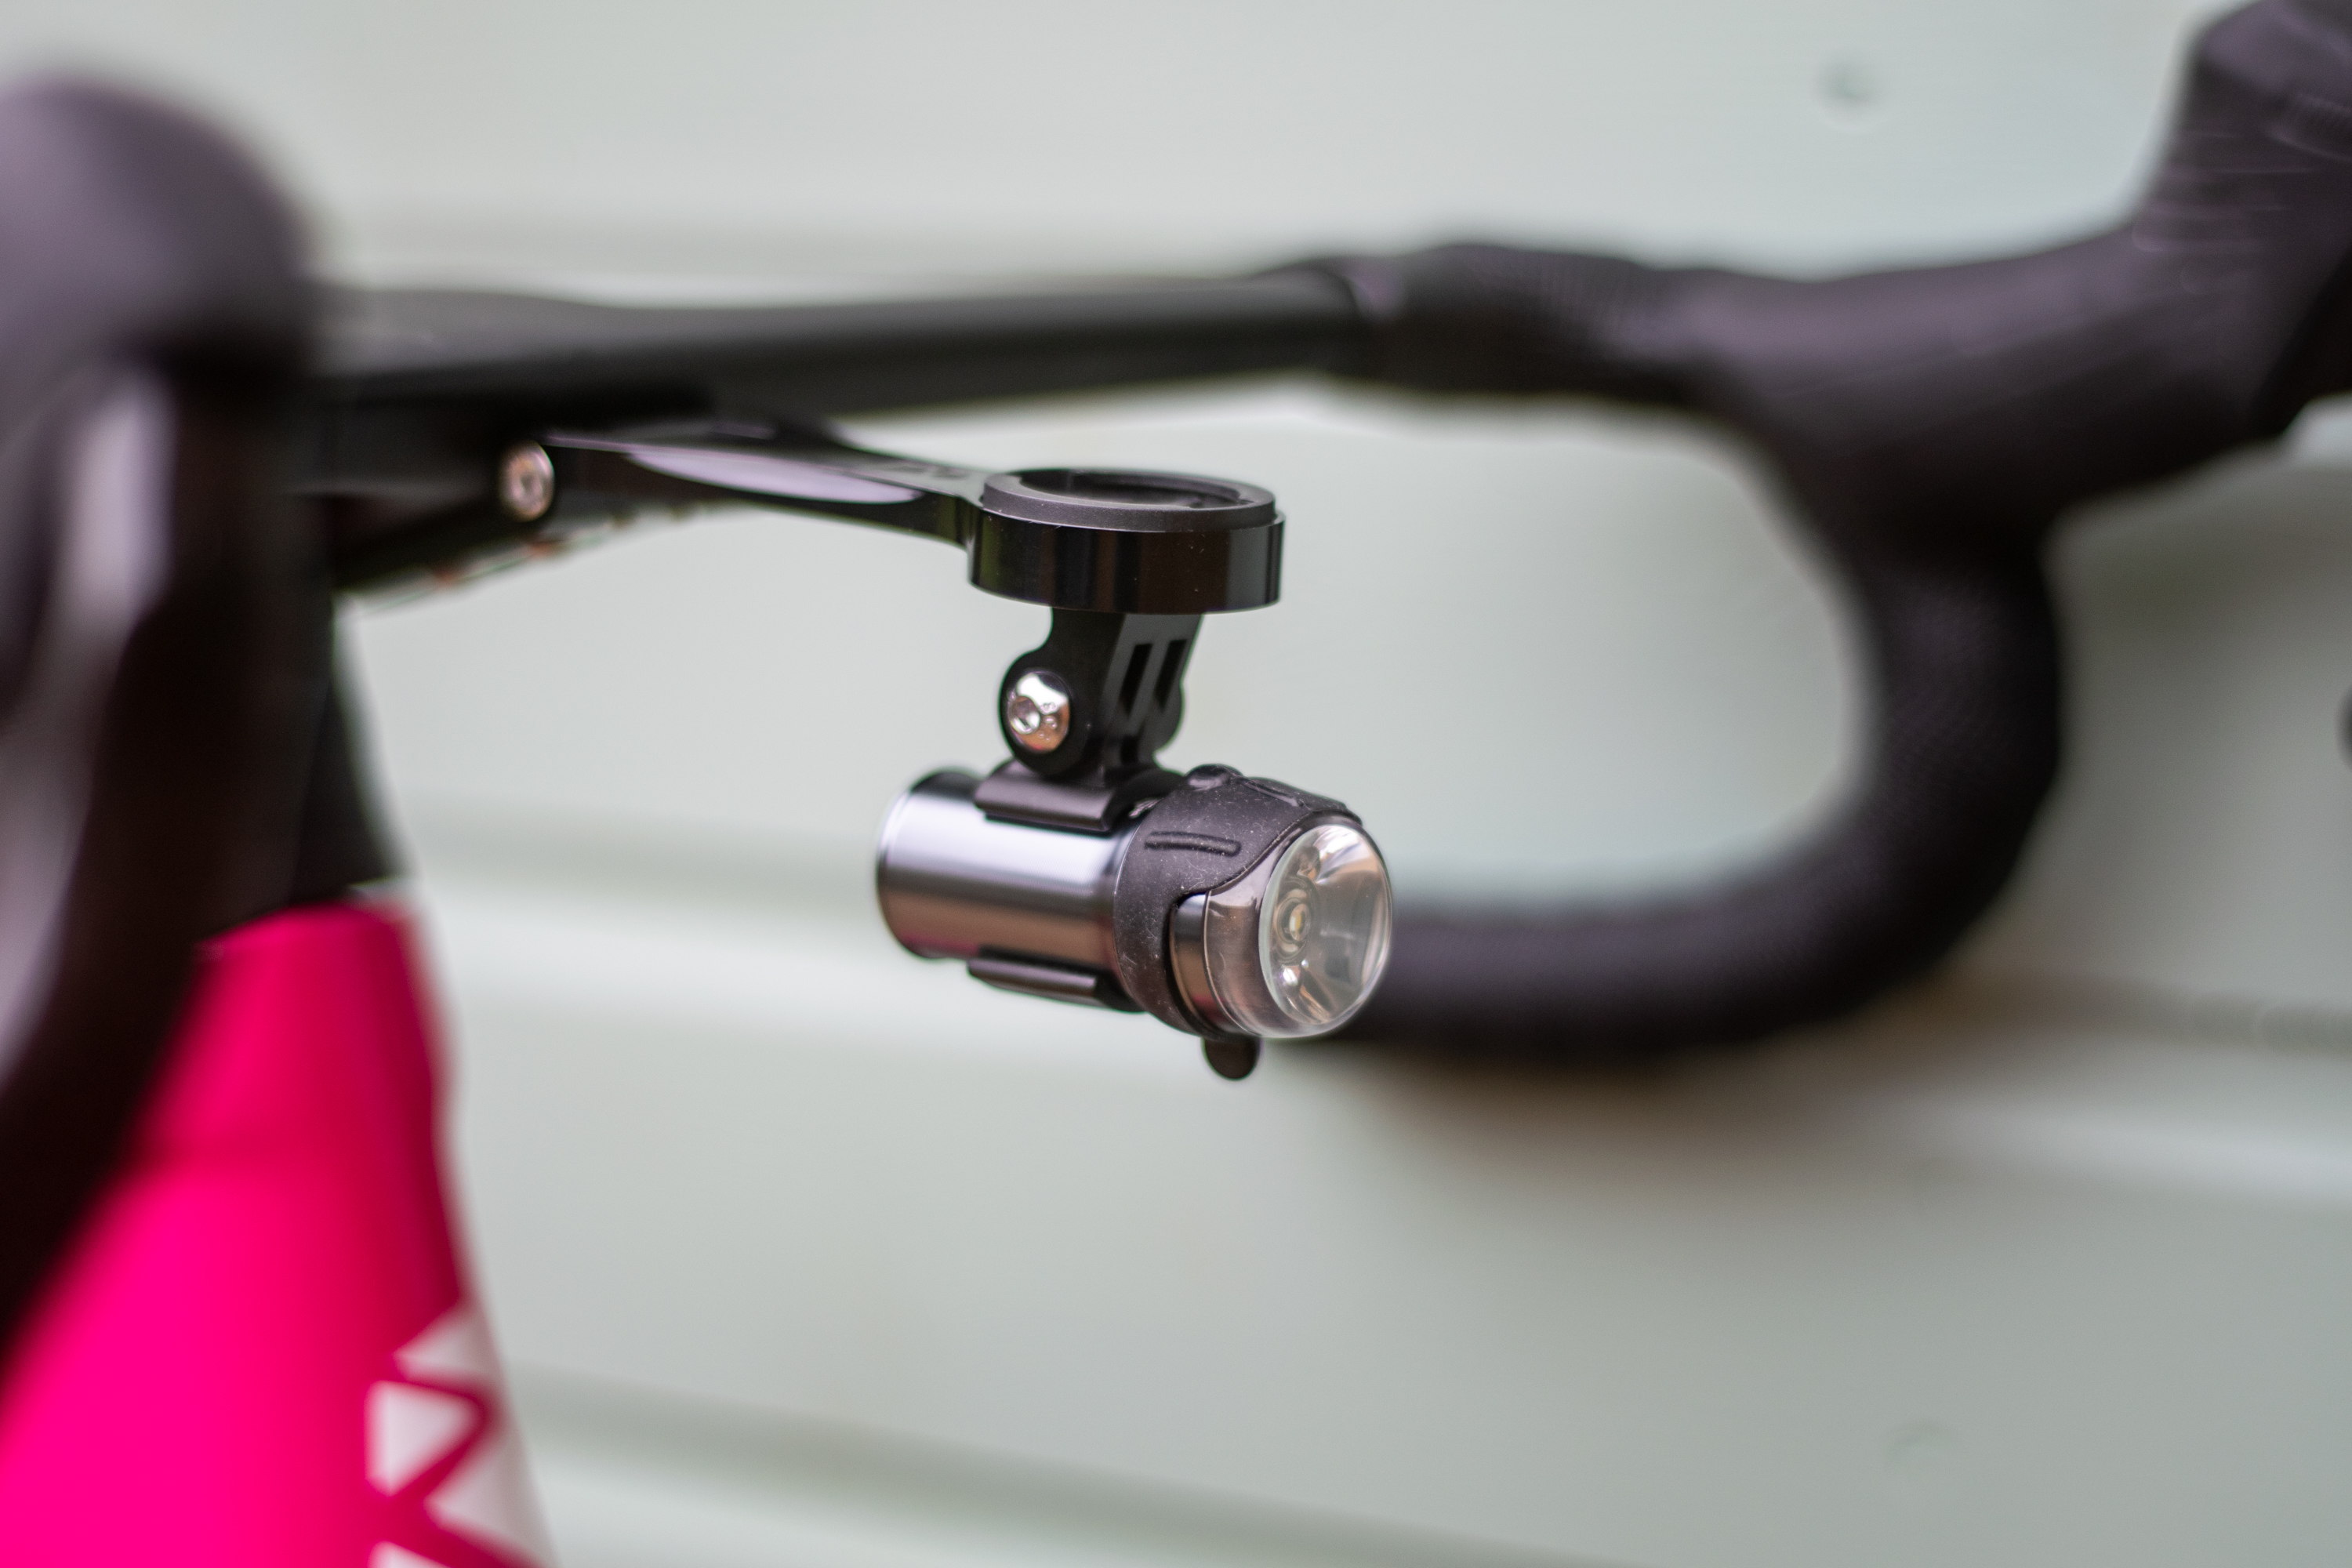
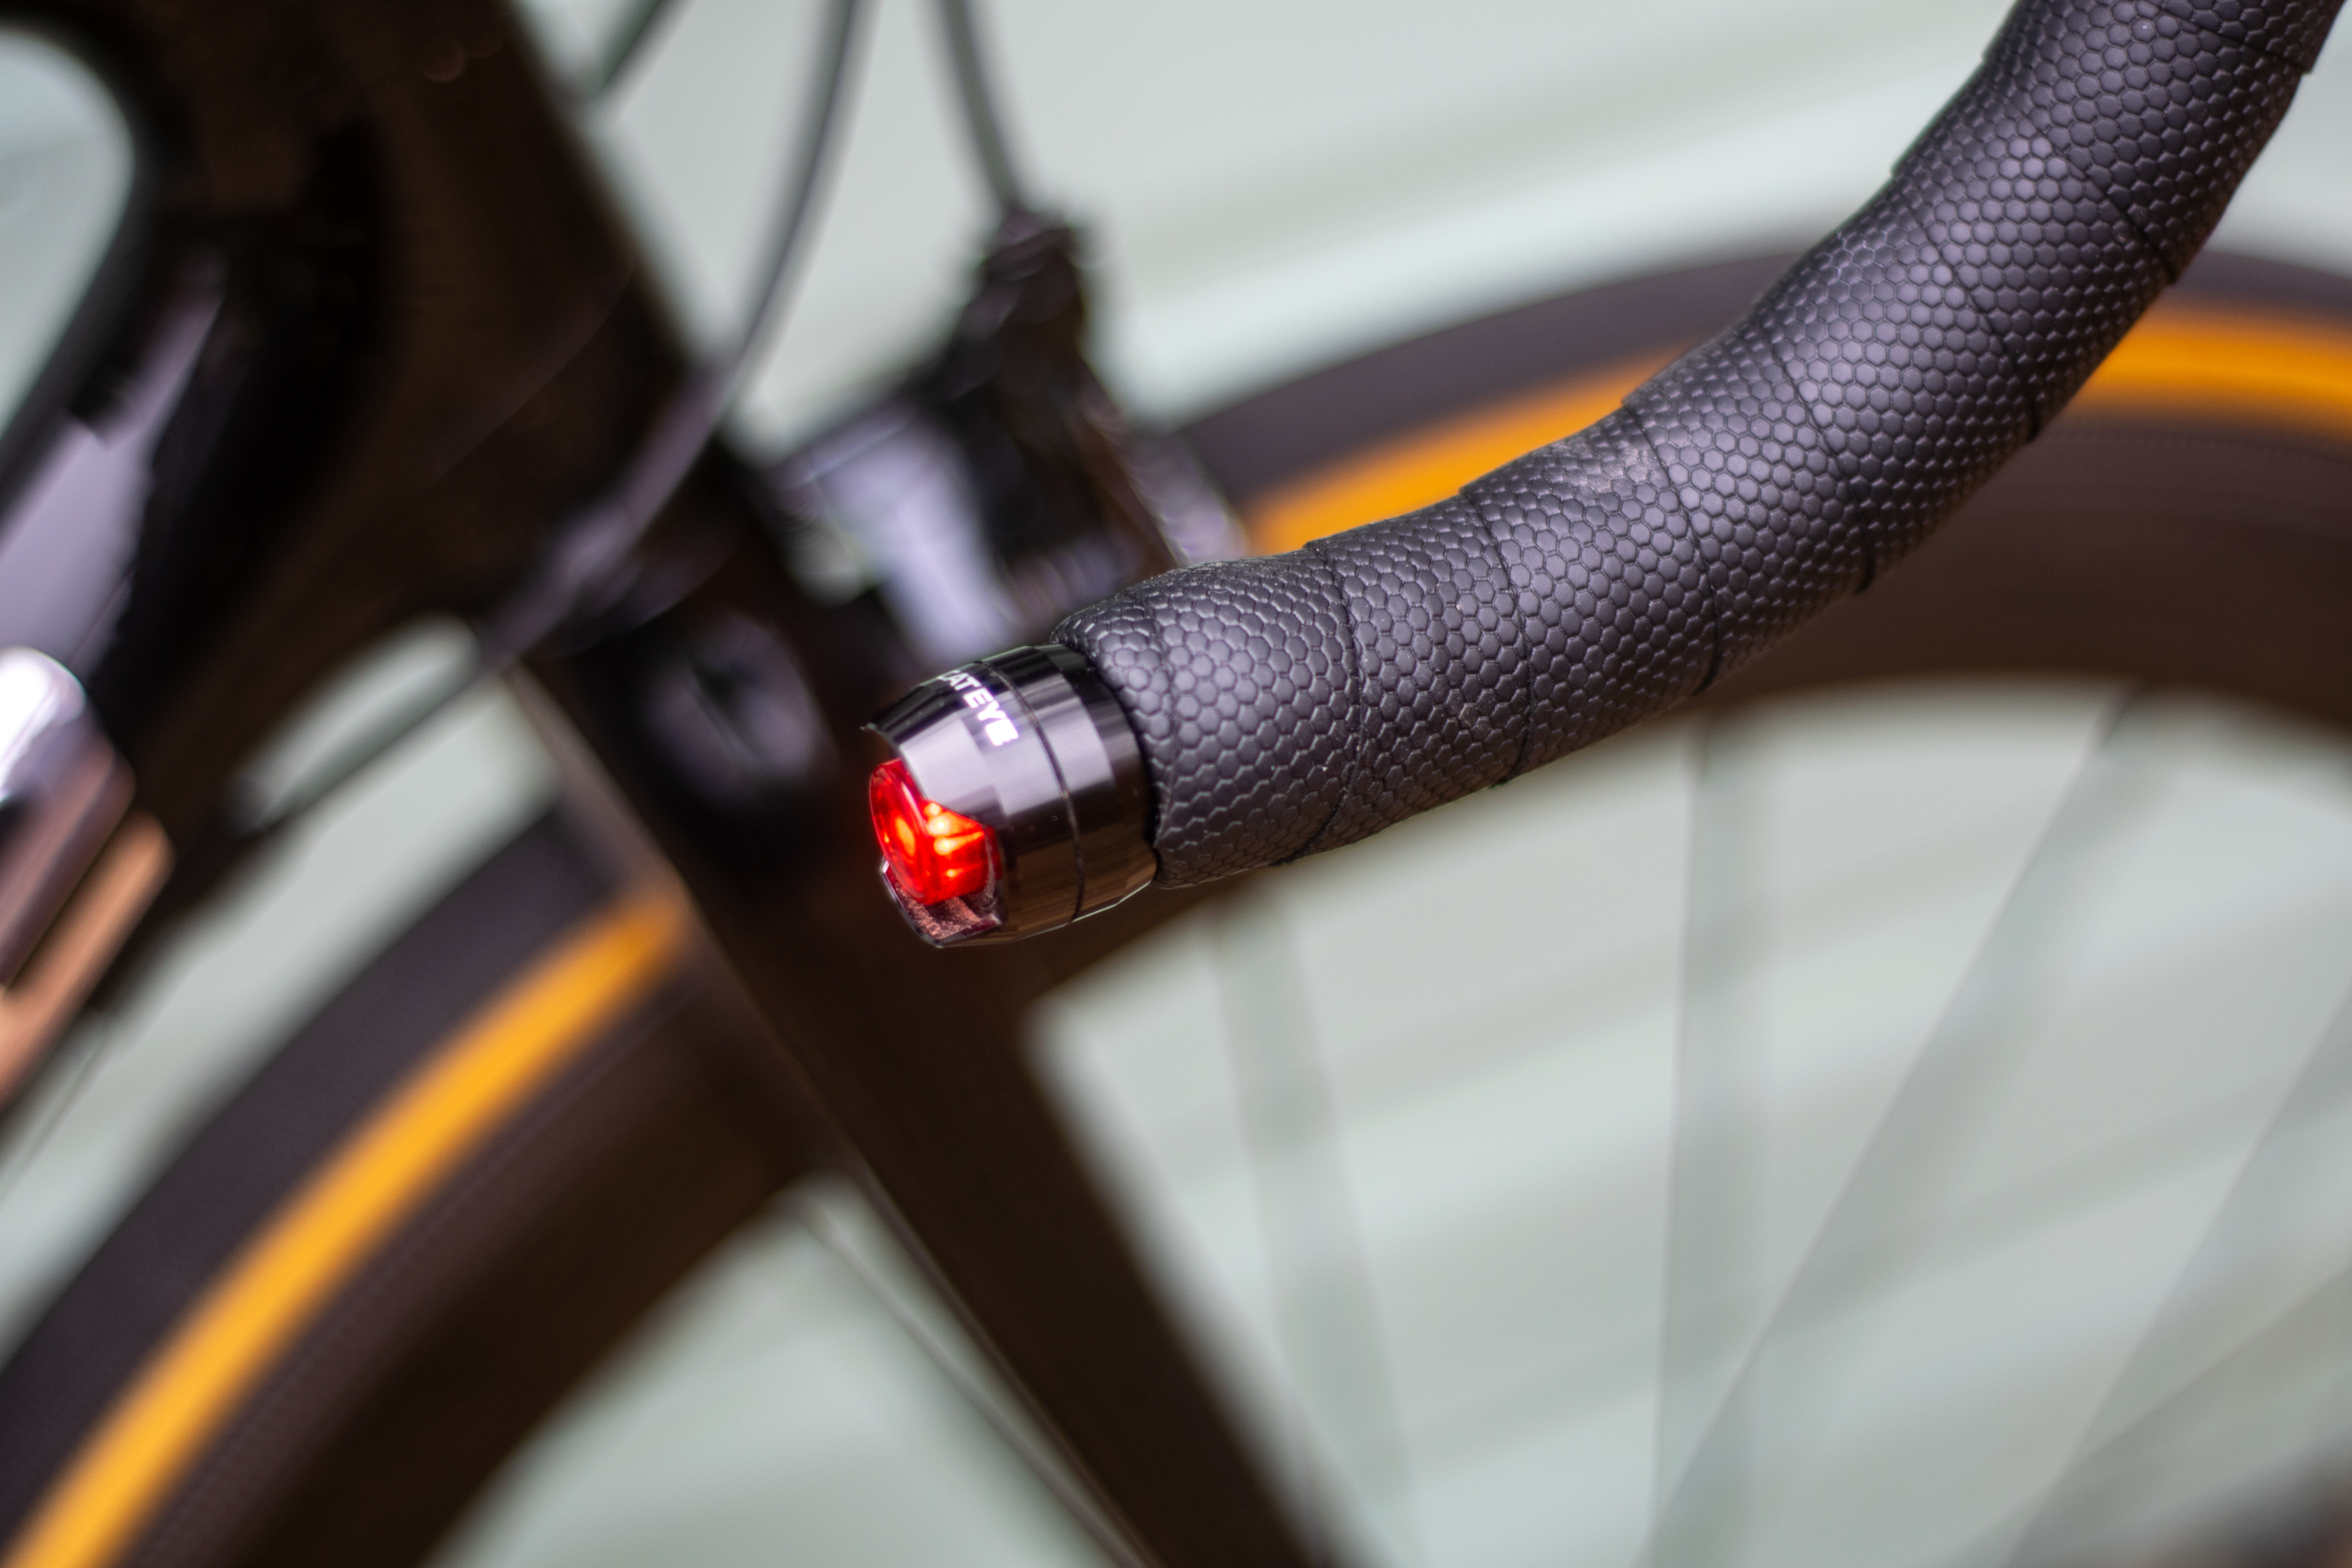
Second, if you want to really clean things up, a saddle rail-mounted light mount gets your light up behind the saddle and really looks super low profile; a range are available from multiple brands.
The one in the picture is a (deep breath) Exposure Boost-R with ReAKT and Peloton light with an Exposure saddle rail mount. This looks great, but it may mean rethinking your saddle bag setup.
Fit them into an existing space

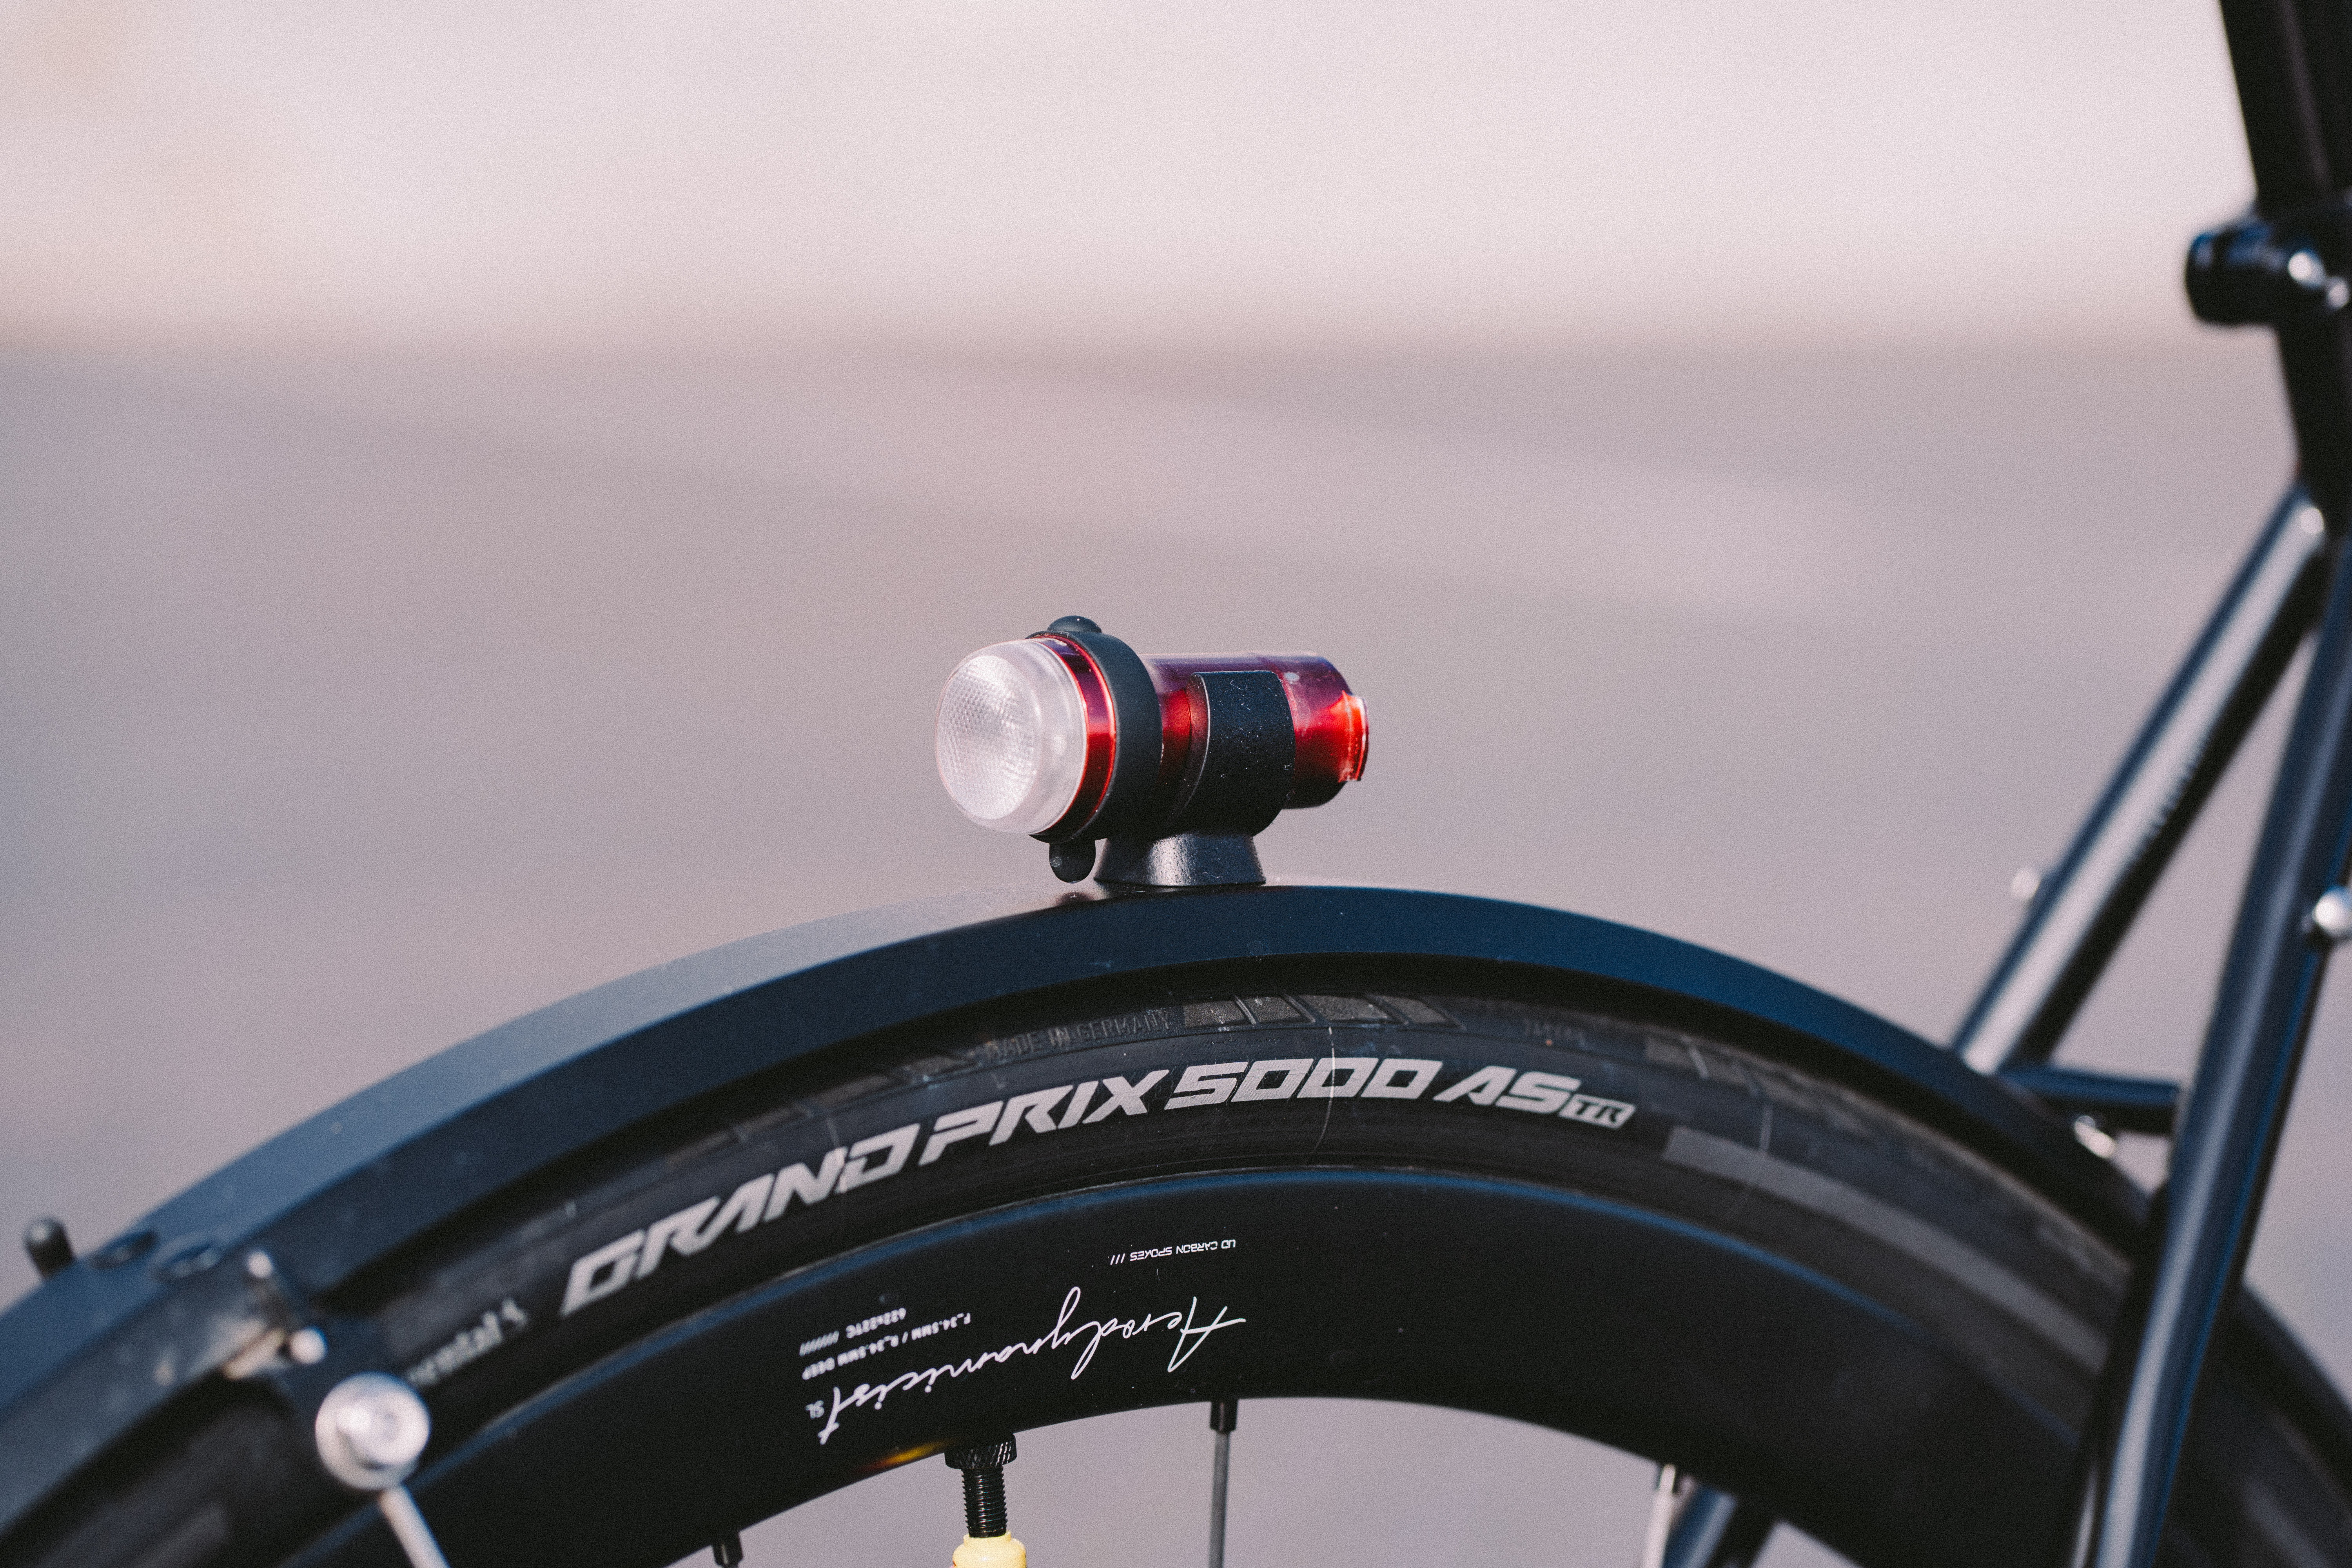
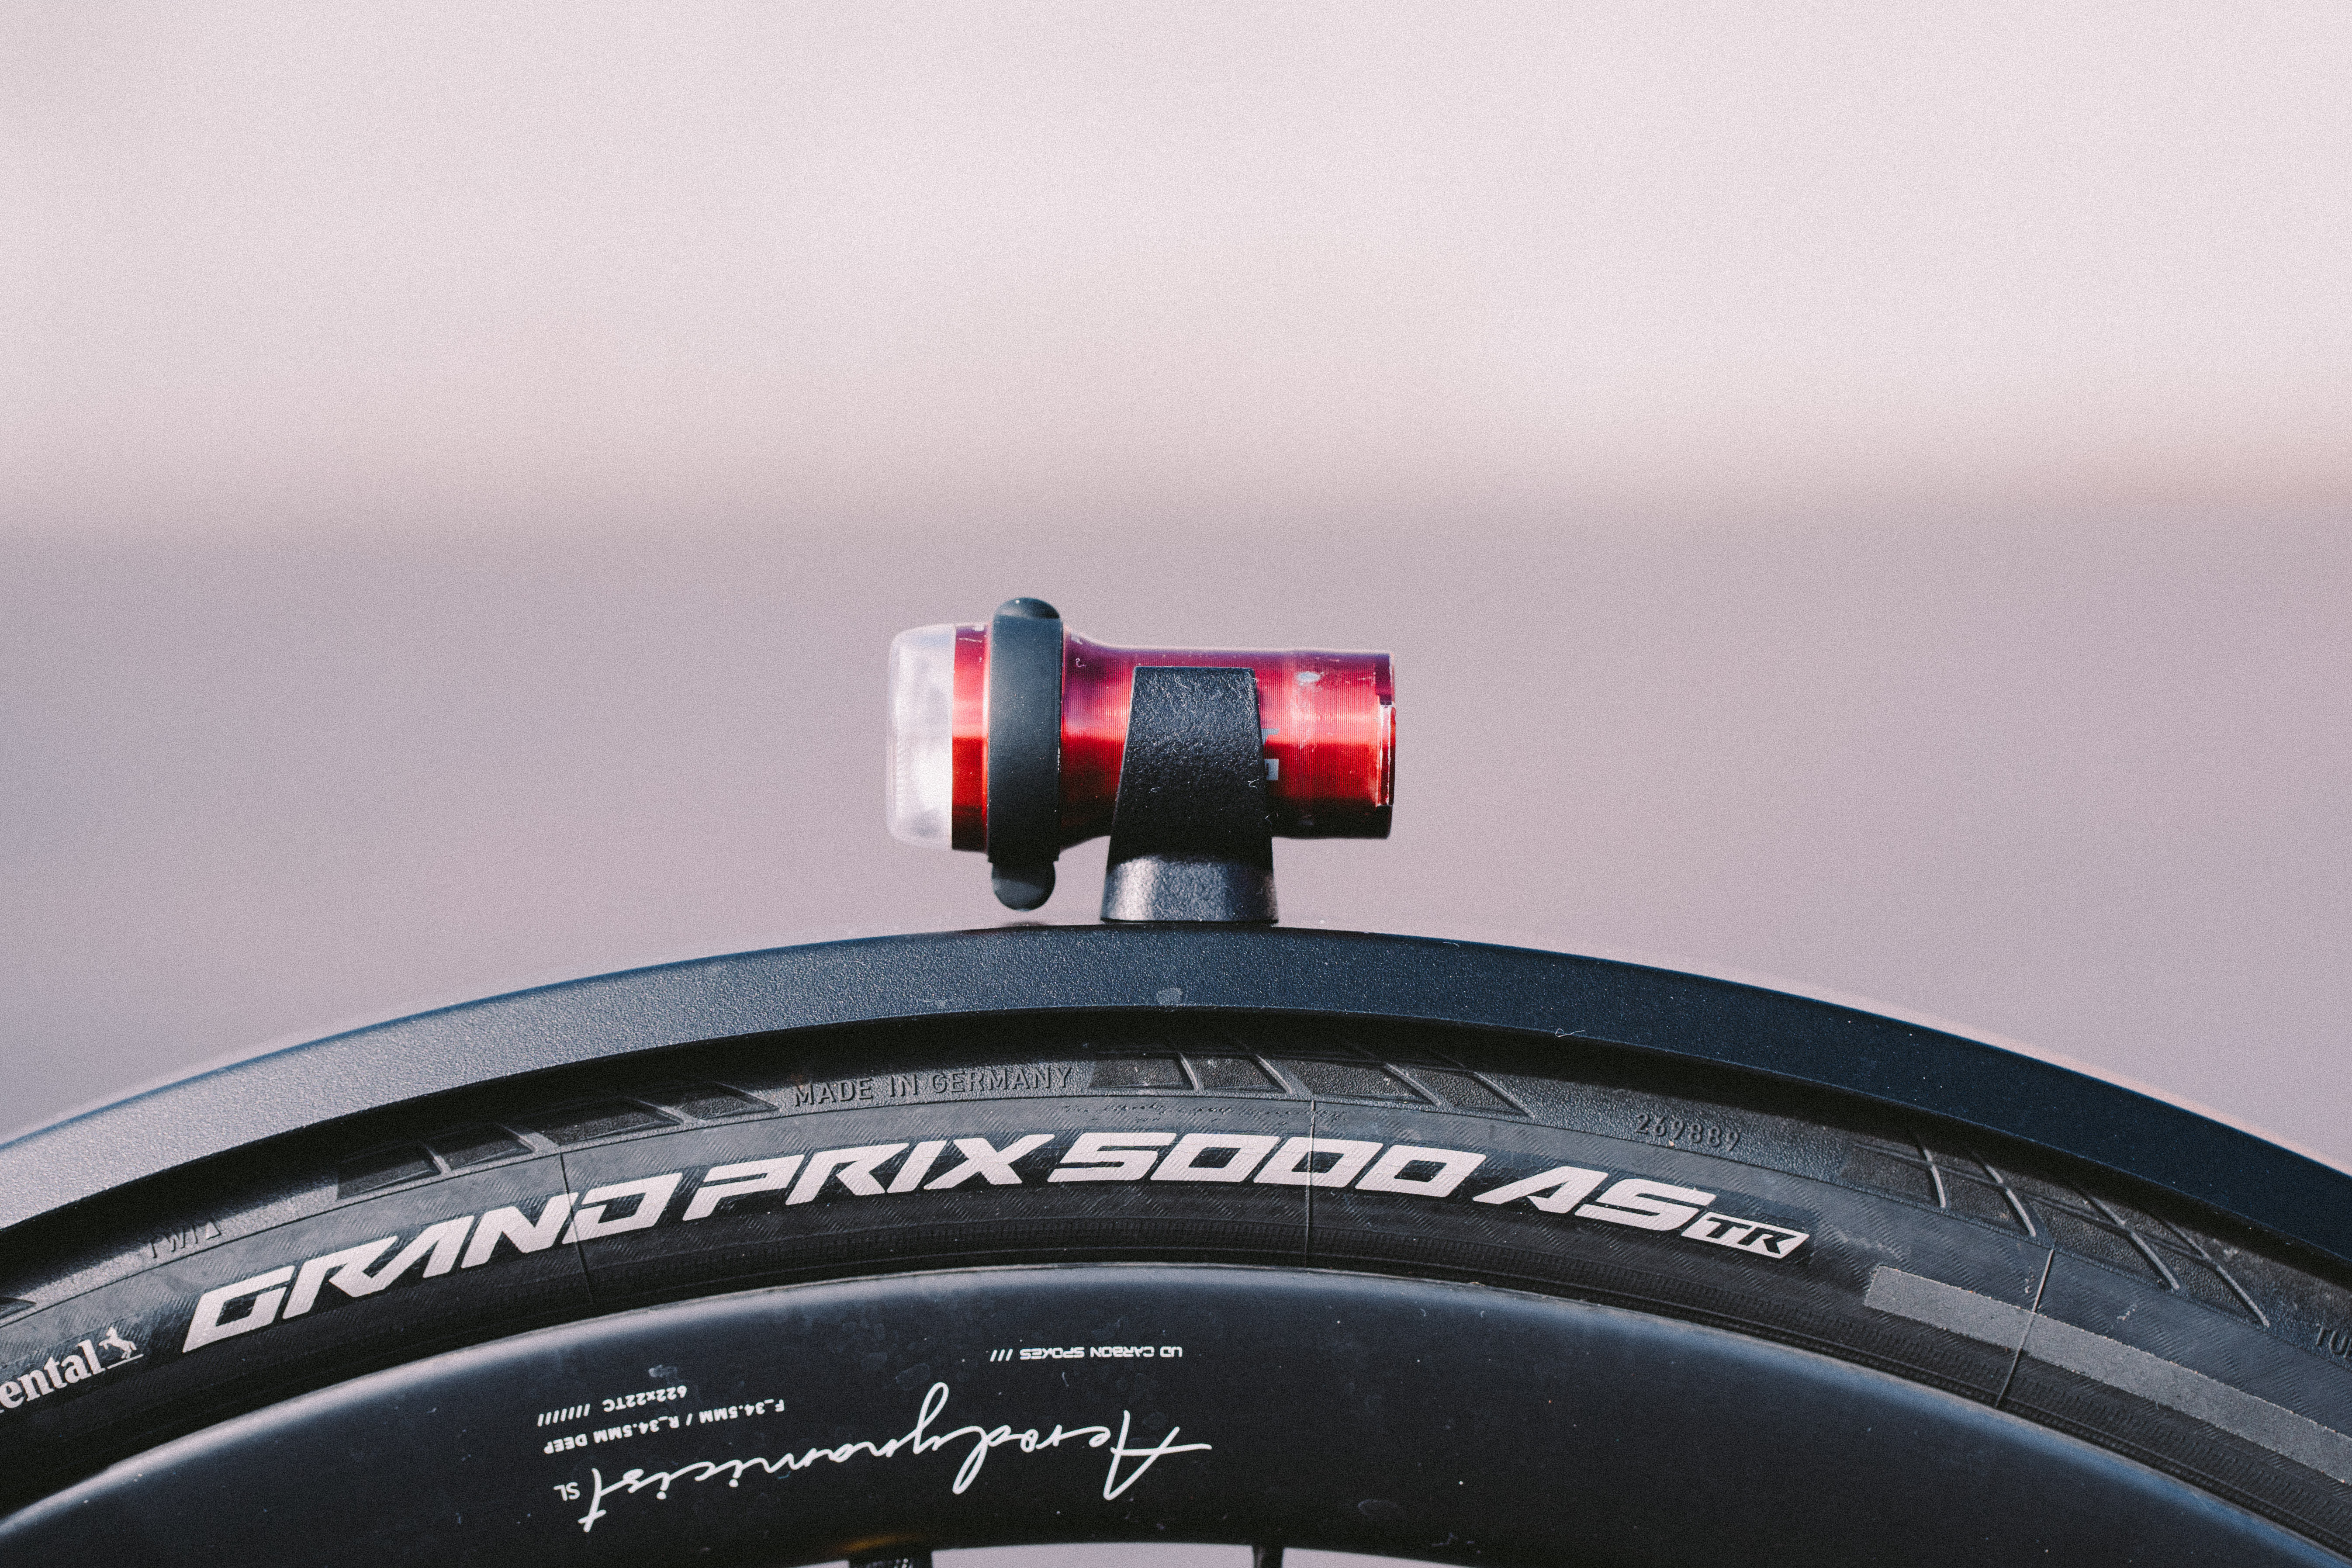
Another way to achieve a clean light setup is by fitting bar-end plugs that double as lights. This works by utilising existing space on the bike to add two additional lights that you wouldn't normally use. I like doing this for winter to easily add two additional lights for little cost and minimal effort.
I have a pair of Cateye Orb bar plug lights mounted to the ends of the handlebars of my Dolan winter bike; they simply replace the bar end plugs and are CR2032 battery powered. It’s a very unobtrusive way of adding extra lights to your setup. What sold me originally was driving up behind a cyclist on an unlit road who was running them; they make the bike look so much wider and alerted me to their presence more effectively.
Get the tools out
3D printing and the ease with which it can be done these days have meant that a vast array of components can be printed cheaply and easily now, providing solutions to a wide range of problems.
This is the case in the light space, and 3D printed brackets and mounts, as mentioned, provide workarounds to specific light fitment issues and can help make things look neater than ever before. If you have a certain issue or requirement now for your lights, a custom mount probably isn't going to be very difficult to produce, and could really make your bike look neat.
My colleague Will recently sought help from a company to provide a mudguard-mounted light bracket, providing a solution to a specific issue he had.
“This specific light mount was built to tackle two issues I have. The first is that I hate having elastic bands or O-rings on my bike; they look ugly, and I'd much rather have a permanent solution.
"The second, non-aesthetic problem is that in winter I often run a large Carradice saddlebag to take layers, snacks, spares, and generally just because I like the vibe, but even with my rear light right at the base of my seatpost, it is often obscured, and therefore rendered useless."
Bags, mudguards and other accessories can sometimes obscure lights or make fitment hard. This was the root of the problem for Will, and he wanted to change his lights on his bike, but how?
"To fix this problem, I got in touch with Jaggers from 3bits.cc, a small brand that makes really neat mounts, and asked to be a crash test dummy for a mudguard mount for my Exposure Boost-R.
"A few photos, some back and forth on design, and a wait for the 3D printer to do its thing and here's the result: a neat, sturdy, bolt-on solution that shows that if you want something made, you should just reach out to some makers on Instagram and see what you can concoct. Off-the-peg options start from around £20-25."
This is a perfect example of how 3D printing can provide highly useful solutions for your particular bike and setup. Want to mount a light to a mudguard or neatly underneath your saddle? No problem, reach out to a company and see what they can do for you and your bike.
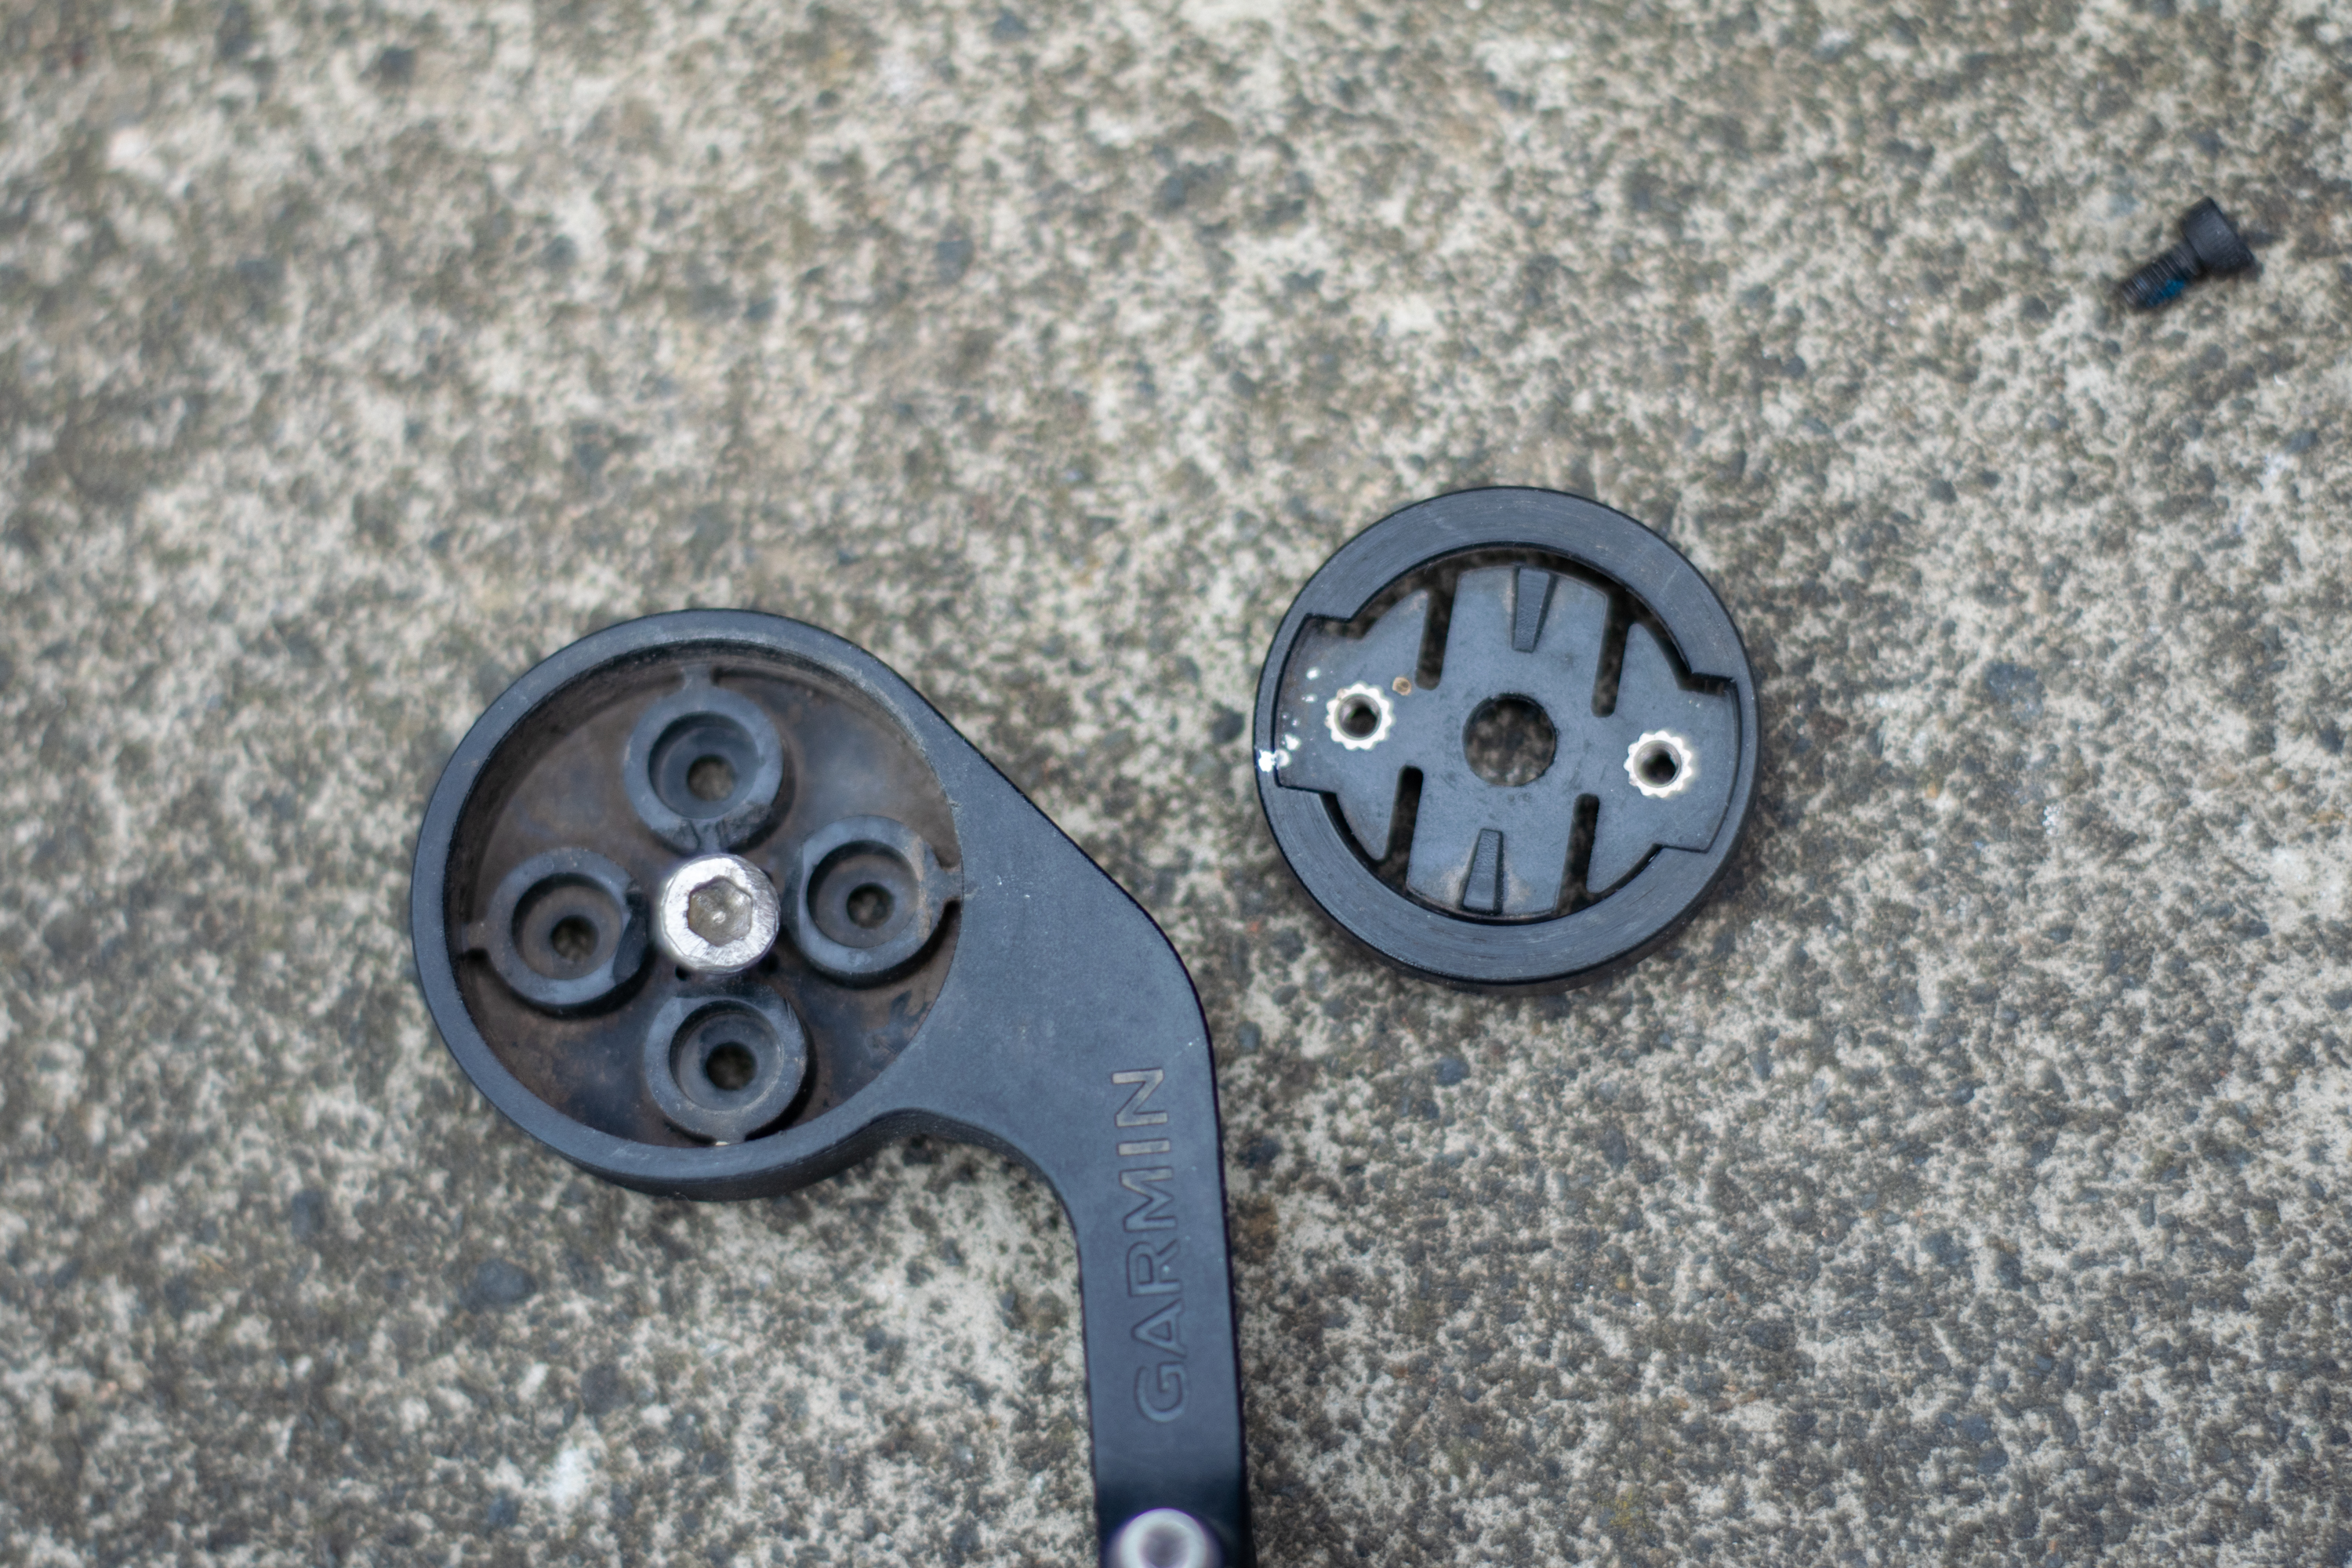
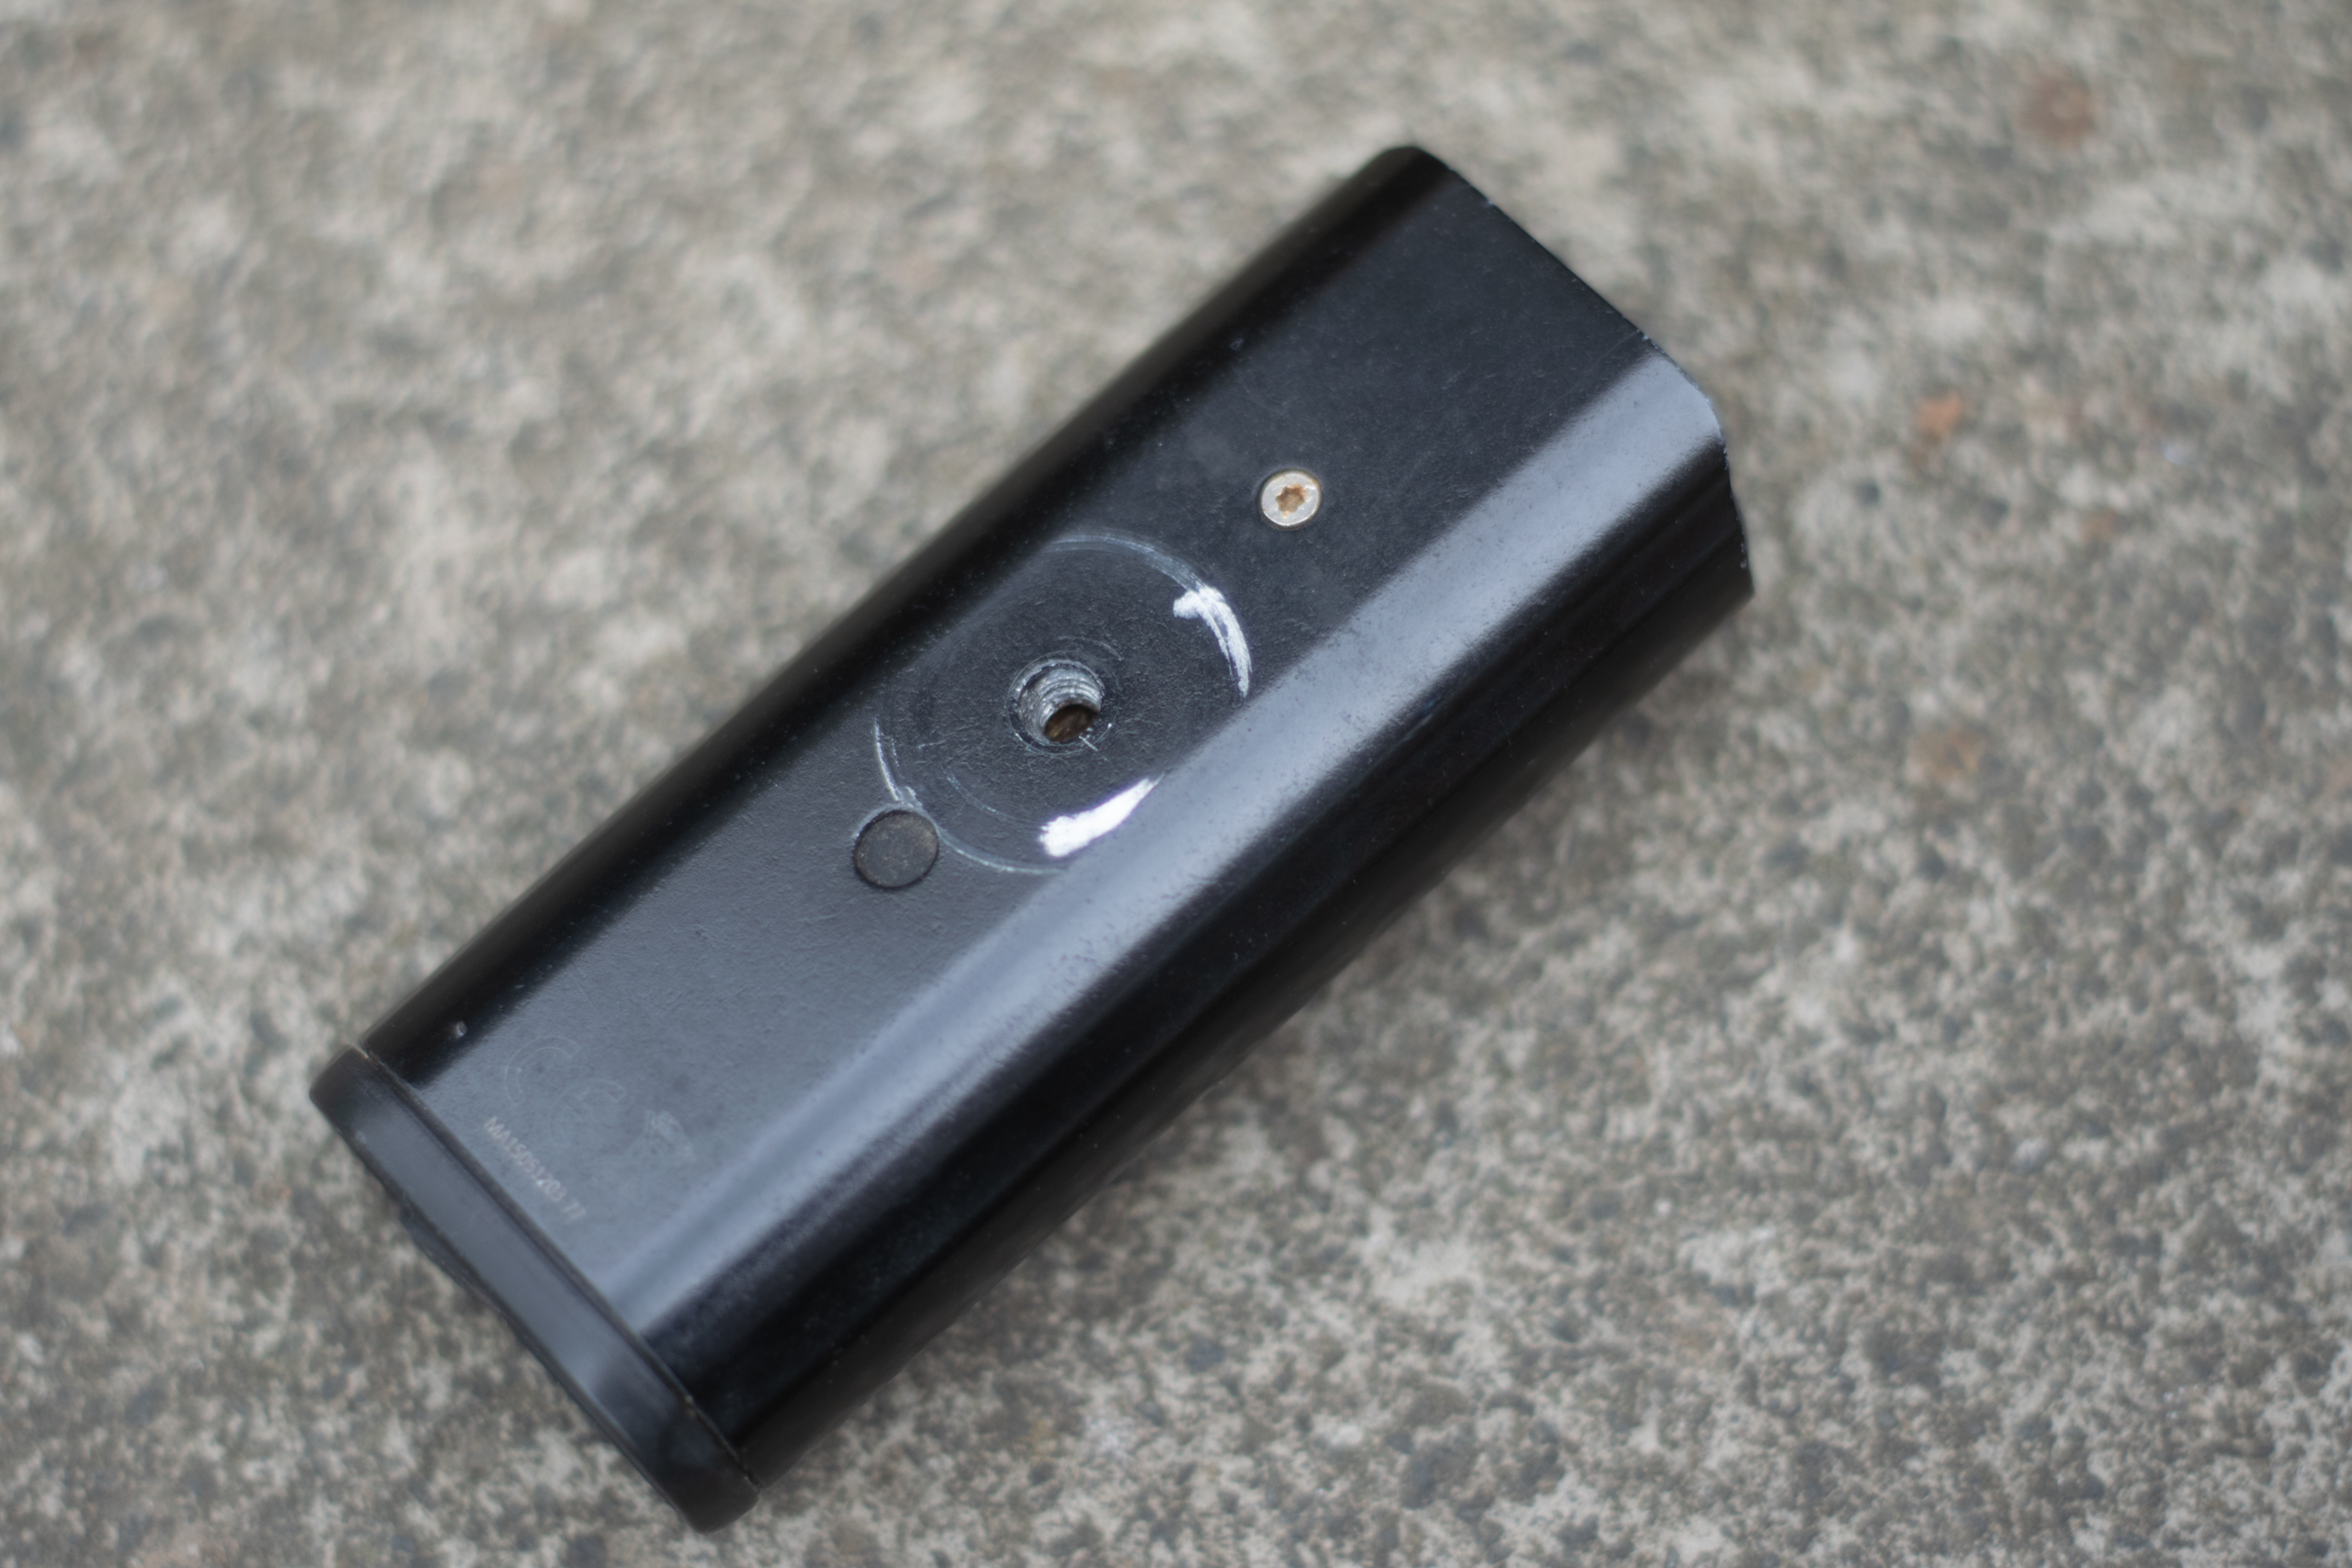
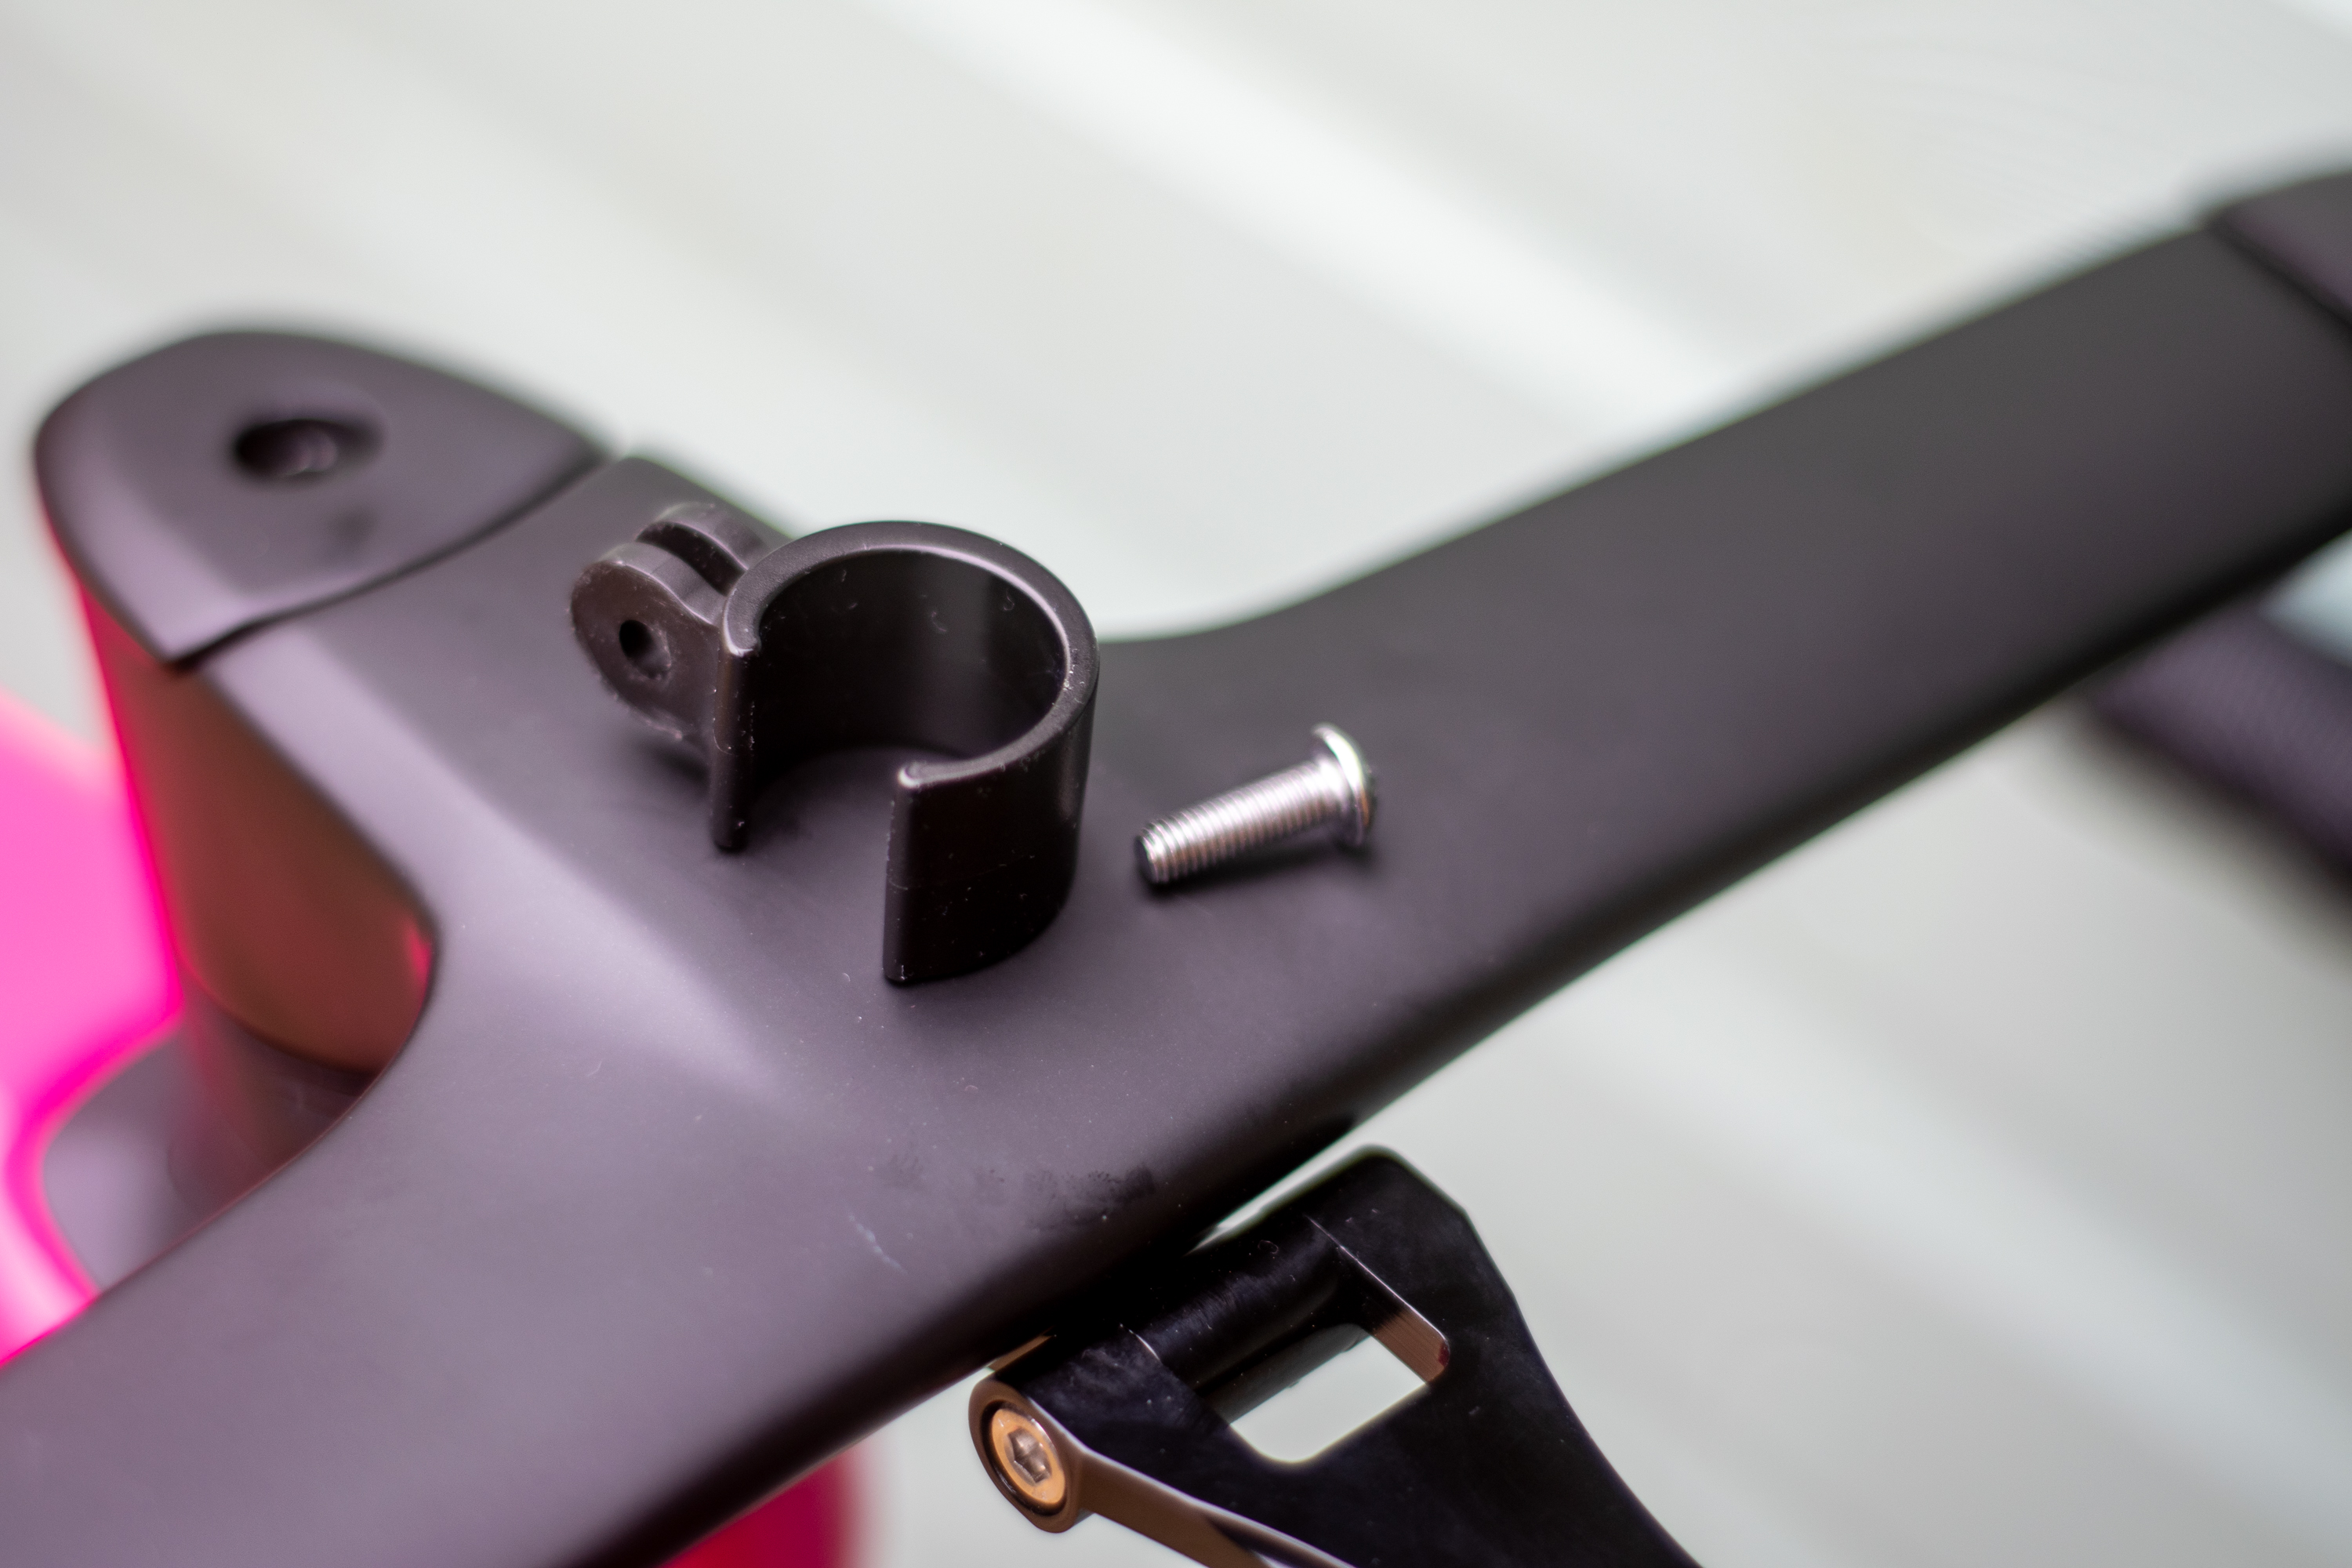
It isn't possible to cover every mount and light type here, but here's another little mod for getting a super clean light setup on a Garmin computer mount and with a light that already has a thread on its body, which can be the case to connect to certain bar mounts. You could also drill the body of the light to do this, but I wouldn't recommend it.
Utilising the existing thread on a light body gives you a way to mount the light to a Garmin mount with no adaptors or brackets whatsoever; you just need a bolt and some tools.
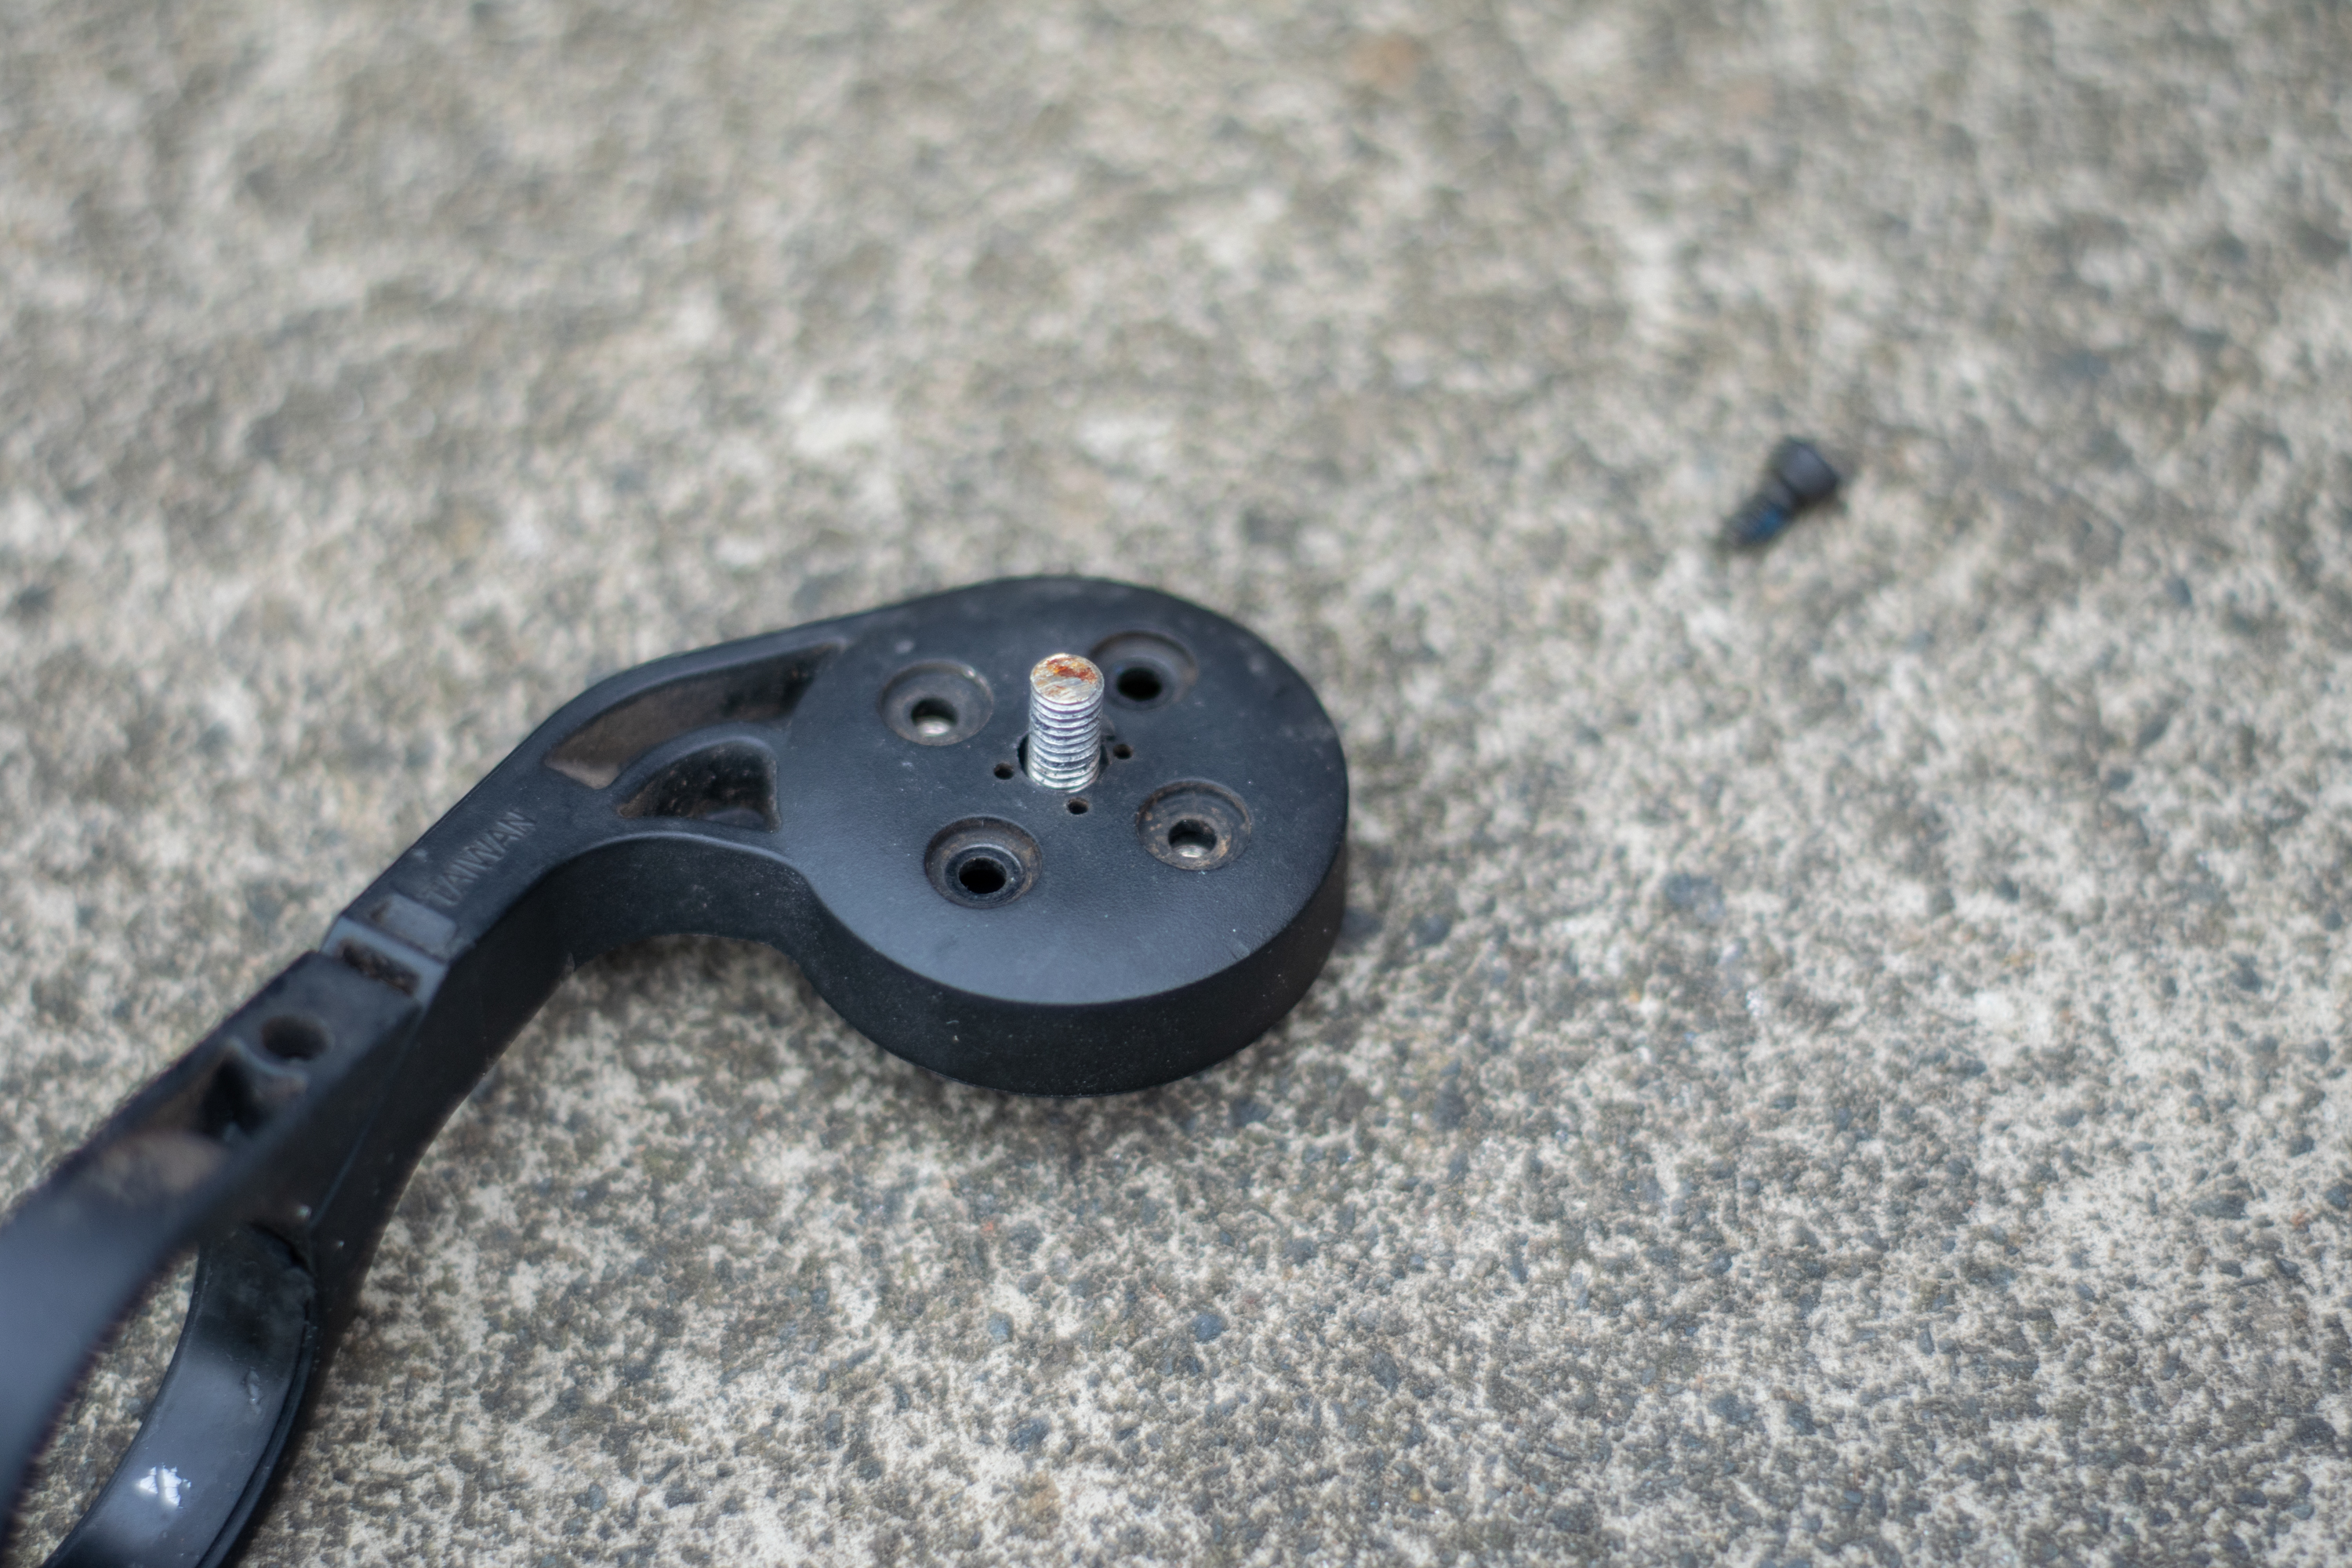
I've outlined the process above with images, but you'll need to remove the computer mount insert from the mount itself and drill a larger hole in the middle of the insert and the bottom of the mount to accomodate an M3 size bolt or similar, you may also need to cut the bolt to the required length and lightly file the bolt head to get a clean fit.
Once the bolt is in place, reattach the computer mount insert and use a hex key to screw the computer to the mount. There you go, a light attached to the computer mount without any kind of adaptor, and it looks very clean.
This is just an example, but it shows what's possible with a bit of creative thinking. Side note, if doing this means running your light upside down, double-check your specific light model and beam is safe to be run upside down; some are not due to the beam pattern and type.
Custom fabrication
It’s possible to go a step further and build light integration into a bike frame itself. Of course, dynamo light wiring has been wired into parts of bike frames for decades, but it’s possible to achieve an incredibly clean setup these days if you go down the custom route.
I got in touch with custom frame builder Rob English, owner of English Cycles and a man responsible for some incredible custom bikes, to see what kinds of things are possible regarding light integration if you really want to get creative.
English custom light integration work seems to revolve around Dynamo light setups or custom solutions to integrate lights into frames themselves.
“Most of the integrated light setups I have done have been with dynamo lights. The cleanest way to integrate a dynamo hub is to use a custom fork with the SON SL dynamo hub. This uses the dropouts as the connectors, so there are no plugs to mess with or see, and the steel fork acts as one leg of the wiring.
“Then the front light can be mounted at the fork crown, with a wire running to the rear light. With a fully hidden cable build, the rear light wire could be run up the inside of the steerer and into the frame to be completely out of sight.
"For integrating the rear light, it depends on the build - I have mounted lights under saddles, at the seat clamp, on the seatstays and at the dropout. In each case, the wiring runs internally right to the mounting point. Sometimes this involves additional parts - such as a saddle mount requiring a connector in the wire so that the seatpost can be removed from the frame."
English's own custom winter bike features a light integrated into the seatpost itself, surely the ultimate clean light solution. Ok, incorporating a light into a bike frame may be unnecessary for some of us, but if you're all about neatness and custom solutions, this could be a viable option.
"On my personal winter bike, I liked the idea of having an integrated rear light that couldn't be forgotten or stolen. But didn't want to go the dynamo route. The bike has a seatmast, which gave me mounting space.
"I modified an Exposure rear light to remove the lip on the body, so that it could slide into a socket brazed into the frame. There is then a small bolt accessed from inside the seat mast to secure it in place. The USB-C port on the underside of the light makes it easy enough to charge while on the bike."

It seems e-bikes also open a lot of doors when it comes to custom light setups. English explained that his own e-cargo bike had some very custom lighting thanks to the power available from the main battery.
"On my e-cargo bike, with the main battery available for powering the lights, I added a strip of white LEDs to the front rack, and rear ones to the rear fender and seatmast - all with fully internal routing including a control unit to vary the pattern/speed of the pulsing.
"The front light is mounted on the fender, because this sits under the frame-mounted front rack, there wasn't a way to access the power button on the back of the light. So I removed the switch from the light and ran the wiring under the fender and up the inside of the steerer. There is then a machined housing on the handlebar for the switch to enable easy access."
At the end of the day, bikes still need pedalling, and a neat light placement won't make your next hard, cold ride any easier. However, if you improve your setup this winter, the morale boost and sense of pride in your machine may just mean the pedals turn that little bit easier, and spring doesn't seem so far away.


You must confirm your public display name before commenting
Please logout and then login again, you will then be prompted to enter your display name.